<?xml version="1.0" encoding="utf-8"?><feed xmlns="http://www.w3.org/2005/Atom" ><generator uri="https://jekyllrb.com/" version="4.3.3">Jekyll</generator><link href="https://wesleygrimes.com/feed.xml" rel="self" type="application/atom+xml" /><link href="https://wesleygrimes.com/" rel="alternate" type="text/html" /><updated>2024-05-17T21:56:59+00:00</updated><id>https://wesleygrimes.com/feed.xml</id><title type="html">Wesley Grimes</title><subtitle>Wes is a lead software engineer specializing in enterprise web apps.  In his spare time, he loves mentoring new developers, tracking the weather,  and contributing to open source projects like NgRx.  If you follow him on Twitter you’re going to find a lot of pictures of food,  sunsets, and tidbits about Angular.</subtitle><entry><title type="html">How to upgrade your Angular and NgRx Apps to v8</title><link href="https://wesleygrimes.com/angular/2019/06/14/how-to-upgrade-your-angular-and-ngrx-apps-to-v8.html" rel="alternate" type="text/html" title="How to upgrade your Angular and NgRx Apps to v8" /><published>2019-06-14T15:00:00+00:00</published><updated>2019-06-14T15:00:00+00:00</updated><id>https://wesleygrimes.com/angular/2019/06/14/how-to-upgrade-your-angular-and-ngrx-apps-to-v8</id><content type="html" xml:base="https://wesleygrimes.com/angular/2019/06/14/how-to-upgrade-your-angular-and-ngrx-apps-to-v8.html"><![CDATA[<h2 id="overview">Overview</h2>

<p>Do you have an awesome application written with Angular v7 using NgRx v7, but have been feeling left out will all the mentions online and at conferences about Angular v8 and NgRx v8? Well, you are in luck! Today we will explore together, how to upgrade our applications to use Angular v8 using the Angular CLI tooling. We will also explore upgrading to NgRx v8. This will allow us to take advantage of the new features provided in NgRx v8. Included with NgRx v8 is a shiny set of creators, or type-safe factory functions, for actions, effects, and reducers.</p>

<p>This article has been adapted from an original post on  <a href="https://ultimatecourses.com/blog/how-to-upgrade-your-angular-and-ngrx-apps-to-v8">Ultimate Courses</a>.</p>

<h2 id="upgrading-dependencies">Upgrading Dependencies</h2>

<h3 id="upgrading-angular">Upgrading Angular</h3>

<blockquote>
  <p>The Angular team has provided a great website that walks through the process of upgrading in-depth. This website can be found at <a href="https://update.angular.io/">Angular Update Tool</a>. We will touch on some of the information today.</p>
</blockquote>

<p>The first step is the process is to upgrade our application to Angular v8. We will use the Angular CLI to manage this process for us.</p>

<p>This is the preferred method, as Angular has provided built-in migration scripts or schematics to alleviate some of the manual process involved had we just simply updated versions in our <code>package.json</code>.</p>

<p>Let’s start by running the following command in the terminal:</p>

<p>Update the Global Angular CLI version</p>

<pre><code class="language-shell">npm install -g @angular/cli
</code></pre>

<p>Update the core framework and local CLI to v8</p>

<pre><code class="language-shell">ng update @angular/cli @angular/core
</code></pre>

<blockquote>
  <p>Throughout this process, we might encounter issues with third-party libaries. In those instances, it is best to visit the GitHub issues and repositories for those libraries for resolution.</p>
</blockquote>

<h3 id="upgrading-ngrx">Upgrading NgRx</h3>

<p>Now that we have upgraded our application to use Angular v8, let’s proceed with updating NgRx to v8. We will make use of the Angular CLI here as well.</p>

<p>Update NgRx to v8</p>

<pre><code class="language-shell">ng update @ngrx/store
</code></pre>

<p>The prior command should update our <code>package.json</code> dependencies and run any NgRx-provided migrations to keep our application in working order.</p>

<p>Depending on your setup, <code>ng update @ngrx/store</code> may not automatically update the additional <code>@ngrx/*</code> libraries that you have installed. If this happens, the best course is to manually run <code>npm install</code> for each additional module in use with NgRx.</p>

<p>Examples are as follows:</p>

<pre><code class="language-shell">npm install @ngrx/entity@latest
npm install @ngrx/effects@latest
npm install @ngrx/data@latest
npm install @ngrx/router-store@latest
</code></pre>

<h4 id="ngrx-migration-guide">NgRx Migration Guide</h4>

<p>The NgRx team has provided a detailed migration guide for updating to NgRx v8. More information on upgrading to v8 of NgRx can be found here: <a href="https://ngrx.io/guide/migration/v8">V8 Update Guide</a></p>

<h2 id="learn-by-example---a-fruit-store-ngrx-v7">Learn by Example - a Fruit Store (NgRx v7)</h2>

<p>One of the most popular ways to learn new methods, is through code examples. Let’s explore the following example of a simplified NgRx store that holds an <code>array</code> of <code>Fruit</code> objects.</p>

<p>Each <code>Fruit</code> object consists of three properties <code>fruitId</code>, <code>fruitClass</code> and <code>fruitName</code>.</p>

<pre><code class="language-typescript">interface Fruit {
    fruitId: number;
    fruitType: string;
    fruitName: string;
}
</code></pre>

<p>For example, if we had an <code>orange</code>, it might look something like this:</p>

<pre><code class="language-typescript">const orange: Fruit = {
    fruitId: 1,
    fruitType: 'citrus',
    fruitName: 'orange'
};
</code></pre>

<h3 id="state">State</h3>

<p>Exploring further, our <code>State</code> object in the NgRx store will contain properties like <code>fruits</code>, <code>isLoading</code>, and <code>errorMessage</code>.</p>

<ul>
  <li><code>fruits</code> is defined as an <code>array</code> for <code>Fruit</code> objects</li>
  <li><code>isLoading</code> is a <code>boolean</code> to keep track of when the store is in the process of loading data from an external API.</li>
  <li><code>errorMessage</code> is a <code>string</code> property that is <code>null</code> unless an error has occurred while requesting data from an external API.</li>
</ul>

<p>An example <code>State</code> <code>interface</code> might look like the following:</p>

<pre><code class="language-typescript">interface State {
    fruits: Fruit[];
    isLoading: boolean;
    errorMessage: string;
}
</code></pre>

<p>An example store with <code>fruits</code> loaded might look like the following:</p>

<pre><code class="language-typescript">const state: State = {
    fruits: [
        {
            fruitId: 1,
            fruitType: 'citrus',
            fruitName: 'orange'
        }
    ],
    isLoading: false,
    errorMessage: null
}
</code></pre>

<h3 id="actions">Actions</h3>

<p>Following proper redux pattern guidance, we cannot directly update state, so we need to define a set of actions to work with our state through a reducer. Let’s imagine we have 3 actions for this example:</p>

<ul>
  <li>
    <p><code>[App Init] Load Request</code> - This action is intended to be dispatched from our UI layer to indicate we are requesting to load <code>Fruit</code> objects into our store. This action does not have a payload or <code>props</code>.</p>
  </li>
  <li>
    <p><code>[Fruits API] Load Success</code> - This action is intended to be dispatched from our effects when an <code>[App Init] Load Request</code> has been dispatched, an API has been called and successful response is received from the API. This action contains a payload or <code>props</code> object that includes the <code>array</code> of <code>Fruit</code> object to be loaded into our store.</p>
  </li>
  <li>
    <p><code>[Fruits API] Load Failure</code> - This action is intended to be dispatched from our effects when an <code>[App Init] Load Request</code> has been dispatched, an API has been called and failure response is received from the API. This action contains a payload or <code>props</code> object that includes the error message of our API request, so that it can be loaded into our store.</p>
  </li>
</ul>

<h4 id="ngrx-v7-implementation">NgRx v7 Implementation</h4>

<p>The actual NgRx v7 implementation of our actions might look something like the following:</p>

<pre><code class="language-typescript">import { Action } from '@ngrx/store';
import { Fruit } from '../../models';

export enum ActionTypes {
  LOAD_REQUEST = '[App Init] Load Request',
  LOAD_FAILURE = '[Fruits API] Load Failure',
  LOAD_SUCCESS = '[Fruits API] Load Success'
}

export class LoadRequestAction implements Action {
  readonly type = ActionTypes.LOAD_REQUEST;
}

export class LoadFailureAction implements Action {
  readonly type = ActionTypes.LOAD_FAILURE;
  constructor(public payload: { error: string }) {}
}

export class LoadSuccessAction implements Action {
  readonly type = ActionTypes.LOAD_SUCCESS;
  constructor(public payload: { fruits: Fruit[] }) {}
}

export type ActionsUnion = LoadRequestAction | LoadFailureAction | LoadSuccessAction;
</code></pre>

<h4 id="ngrx-v8---upgrading-to-createaction">NgRx v8 - Upgrading to createAction</h4>

<blockquote>
  <p>It’s important to note, that while <code>createAction</code> is the hot new way of defining an <code>Action</code> in NgRx, the existing method of defining an <code>enum</code>, <code>class</code> and exporting a type union will still work just fine in NgRx v8.</p>
</blockquote>

<p>Beginning with version 8 of NgRx, actions can be declared using the new <code>createAction</code> method. This method is a <code>factory function</code>, or a <code>function</code> that returns a <code>function</code>.</p>

<p>According to the <a href="https://ngrx.io/guide/store/actions#writing-actions">official NgRx documentation</a>, “The <code>createAction</code> function returns a function, that when called returns an object in the shape of the <code>Action</code> interface. The <code>props</code> method is used to define any additional metadata needed for the handling of the action. Action creators provide a consistent, type-safe way to construct an action that is being dispatched.”</p>

<p>In order to update to <code>createAction</code>, we need to do the following steps:</p>

<ol>
  <li>Create a new <code>export const</code> for our action. If our action has a payload, we will also need to migrate to using the <code>props</code> method to define our payload as <code>props</code>.</li>
</ol>

<p>Example for <code>[App Init] Load Request</code></p>

<pre><code class="language-typescript">// before
export class LoadRequestAction implements Action {
  readonly type = ActionTypes.LOAD_REQUEST;
}
</code></pre>

<pre><code class="language-typescript">// after
export const loadRequest = createAction('[App Init] Load Request');
</code></pre>

<p>Example for <code>[Fruits API] Load Success</code></p>

<pre><code class="language-typescript">// before
export class LoadSuccessAction implements Action {
  readonly type = ActionTypes.LOAD_SUCCESS;
  constructor(public payload: { fruits: Fruit[] }) {}
}
</code></pre>

<pre><code class="language-typescript">// after
export const loadSuccess = createAction('[Fruits API] Load Success', props&lt;{fruits: Fruit[]}&gt;());
</code></pre>

<ol>
  <li>
    <p>Remove the old action from the <code>ActionTypes</code> <code>enum</code></p>
  </li>
  <li>
    <p>Remove the old action from the <code>ActionsUnion</code></p>
  </li>
</ol>

<p>Our final migrated actions file might look something like this:</p>

<pre><code class="language-typescript">import { Action, props } from '@ngrx/store';
import { Fruit } from '../../models';

export const loadRequest = createAction('[App Init] Load Request');
export const loadFailure = createAction('[Fruits API] Load Failure', props&lt;{errorMessage: string}&gt;());
export const loadSuccess = createAction('[Fruits API] Load Success', props&lt;{fruits: Fruit[]}&gt;());
</code></pre>

<p>As we can see, this is a huge reduction in code, we have gone from 24 lines of code, down to 6 lines of code.</p>

<h4 id="ngrx-v8---dispatching-createaction-actions">NgRx v8 - Dispatching createAction Actions</h4>

<p>A final note is that we need to update the way we dispatch our actions. This is because we no longer need to create <code>class</code> instances, rather we are calling <code>factory</code> functions that return an object of our action.</p>

<p>Our before and after will look something like this:</p>

<pre><code class="language-typescript">// before 
this.store.dispatch(new featureActions.LoadSuccessAction({ fruits }))

// after
this.store.dispatch(featureActions.loadSuccess({ fruits }))
</code></pre>

<h3 id="reducer">Reducer</h3>

<p>Continuing with our example, we need a reducer setup to broker our updates to the store. Recalling back to the redux pattern, we cannot directly update state. We must, through a pure function, take in current state, an action, and return a new updated state with the action applied. Typically, reducers are large <code>switch</code> statements keyed on incoming actions.</p>

<p>Let’s imagine our reducer handles the following scenarios:</p>

<ul>
  <li>On <code>[App Init] Load Request</code> we want the state to reflect the following values:
    <ul>
      <li><code>state.isLoading: true</code></li>
      <li><code>state.errorMessage: null</code></li>
    </ul>
  </li>
  <li>On <code>[Fruits API] Load Success</code> we want the state to reflect the following values:
    <ul>
      <li><code>state.isLoading: false</code></li>
      <li><code>state.errorMessage: null</code></li>
      <li><code>state.fruits: action.payload.fruits</code></li>
    </ul>
  </li>
  <li>On <code>[Fruits API] Load Failure</code> we want the state to reflect the following values:
    <ul>
      <li><code>state.isLoading: false</code></li>
      <li><code>state.errorMessage: action.payload.errorMessage</code></li>
    </ul>
  </li>
</ul>

<h4 id="ngrx-v7-implementation-1">NgRx v7 Implementation</h4>

<p>The actual NgRx v7 implementation of our reducer might look something like the following:</p>

<pre><code class="language-typescript">import { ActionsUnion, ActionTypes } from './actions';
import { initialState, State } from './state';

export function featureReducer(state = initialState, action: ActionsUnion): State {
  switch (action.type) {
    case ActionTypes.LOAD_REQUEST: {
      return {
        ...state,
        isLoading: true,
        errorMessage: null
      };
    }
    case ActionTypes.LOAD_SUCCESS: {
      return {
        ...state,
        isLoading: false,
        errorMessage: null,
        fruits: action.payload.fruits
      };
    }
    case ActionTypes.LOAD_FAILURE: {
      return {
        ...state,
        isLoading: false,
        errorMessage: action.payload.errorMessage
      };
    }
    default: {
      return state;
    }
  }
}
</code></pre>

<h4 id="ngrx-v8---upgrading-to-createreducer">NgRx v8 - Upgrading to createReducer</h4>

<blockquote>
  <p>It’s important to note, that while <code>createReducer</code> is the hot new way of defining a reducer in NgRx, the existing method of defining a <code>function</code> with a <code>switch</code> statement will still work just fine in NgRx v8.</p>
</blockquote>

<p>Beginning with version 8 of NgRx, reducers can be declared using the new <code>createReducer</code> method.</p>

<p>According to the <a href="https://ngrx.io/guide/store/reducers#creating-the-reducer-function">official NgRx documentation</a>, “The reducer function’s responsibility is to handle the state transitions in an immutable way. Create a reducer function that handles the actions for managing the state using the <code>createReducer</code> function.”</p>

<p>In order to update to <code>createReducer</code>, we need to do the following steps:</p>

<ol>
  <li>Create a new <code>const reducer = createReducer</code> for our reducer.</li>
  <li>Convert our <code>switch</code> <code>case</code> statements into <code>on</code> method calls. Please note, the <code>default</code> case is handled automatically for us. The first parameter of the <code>on</code> method is the action to trigger on, the second parameter is a handler that takes in <code>state</code> and returns a new version of <code>state</code>. If the action provides <code>props</code>, a second optional input parameter can be provided. In the example below we will use destructuring to pull the necessary properties out of the <code>props</code> object.</li>
  <li>Create a new <code>export function reducer</code> to wrap our <code>const reducer</code> for <code>AOT</code> support.</li>
</ol>

<p>Once completed, our updated <code>featureReducer</code> will look something like the following:</p>

<pre><code class="language-typescript">import { createReducer, on } from '@ngrx/store';
import * as featureActions from './actions';
import { initialState, State } from './state';
...
const featureReducer = createReducer(
  initialState,
  on(featureActions.loadRequest, state =&gt; ({ ...state, isLoading: true, errorMessage: null })),
  on(featureActions.loadSuccess, (state, { fruits }) =&gt; ({ ...state, isLoading: false, errorMessage: null, fruits })),
  on(featureActions.loadFailure, (state, { errorMessage }) =&gt; ({ ...state, isLoading: false, errorMessage: errorMessage })),
);

export function reducer(state: State | undefined, action: Action) {
  return featureReducer(state, action);
}
</code></pre>

<h3 id="effects">Effects</h3>

<p>Because we want to keep our reducer a pure function, it’s often desirable to place API requests into <code>side-effects</code>. In NgRx, these are called <code>Effects</code> and provide a reactive, RxJS-based way to link actions to observable streams.</p>

<p>In our example, we will have an <code>Effect</code> that <code>listens</code> for an <code>[App Init] Load Request</code> Action and makes an HTTP request to our imaginary <code>Fruits API</code> backend.</p>

<ul>
  <li>
    <p>Upon a successful result from the <code>Fruits API</code> the response is mapped to an <code>[Fruits API] Load Success</code> action setting the payload of <code>fruits</code> to the body of the successful response.</p>
  </li>
  <li>
    <p>Upon a failure result from the <code>Fruits API</code> the error message is mapped to an <code>[Fruits API] Load Failure</code> action setting the payload of <code>errorMessage</code> to the error from the failure response.</p>
  </li>
</ul>

<h4 id="ngrx-v7-implementation-2">NgRx v7 Implementation</h4>

<p>The actual NgRx v7 implementation of our effect might look something like the following:</p>

<pre><code class="language-typescript">@Effect()
  loadRequestEffect$: Observable&lt;Action&gt; = this.actions$.pipe(
    ofType&lt;featureActions.LoadRequestAction&gt;(
      featureActions.ActionTypes.LOAD_REQUEST
    ),
    concatMap(action =&gt;
      this.dataService
        .getFruits()
        .pipe(
          map(
            fruits =&gt;
              new featureActions.LoadSuccessAction({
                fruits
              })
          ),
          catchError(error =&gt;
            observableOf(new featureActions.LoadFailureAction({ errorMessage: error.message }))
          )
        )
    )
  );
</code></pre>

<h4 id="ngrx-v8---upgrading-to-createeffect">NgRx v8 - Upgrading to createEffect</h4>

<blockquote>
  <p>It’s important to note, that while <code>createEffect</code> is the hot new way of defining a reducer in NgRx, the existing method of defining a class property with an <code>@Effect()</code> decorator will still work just fine in NgRx v8.</p>
</blockquote>

<p>Beginning with version 8 of NgRx, effects can be declared using the new <code>createEffect</code> method, according to the <a href="https://ngrx.io/guide/effects#writing-effects">official NgRx documentation</a>.</p>

<p>In order to update to <code>createEffect</code>, we need to do the following steps:</p>

<ol>
  <li>Import <code>createEffect</code> from <code>@ngrx/effects</code></li>
  <li>Remove the <code>@Effect()</code> decorator</li>
  <li>Remove the <code>Observable&lt;Action&gt;</code> type annotation</li>
  <li>Wrap <code>this.actions$.pipe(...)</code> with <code>createEffect(() =&gt; ...)</code></li>
  <li>Remove the <code>&lt;featureActions.LoadRequestAction&gt;</code> type annotation from <code>ofType</code></li>
  <li>Change the <code>ofType</code> input parameter from <code>featureActions.ActionTypes.LOAD_REQUEST</code> to <code>featureActions.loadRequest</code></li>
  <li>Update the action calls to remove <code>new</code> and to use the creator instead of <code>class</code> instance. For example, <code>new featureActions.LoadSuccessAction({fruits})</code> becomes <code>featureActions.loadSuccess({fruits})</code>.</li>
</ol>

<p>Once completed, our updated <code>loadRequestEffect</code> will look something like the following:</p>

<pre><code class="language-typescript">  loadRequestEffect$ = createEffect(() =&gt; this.actions$.pipe(
        ofType(featureActions.loadRequest),
        concatMap(action =&gt;
        this.dataService
            .getFruits()
            .pipe(
                map(fruits =&gt; featureActions.loadSuccess({fruits})),
                catchError(error =&gt;
                    observableOf(featureActions.loadFailure({ errorMessage: error.message }))
                )
            )
        )
    )
  );
</code></pre>

<h2 id="full-video-walkthrough">Full Video Walkthrough</h2>

<p>If you would like to watch a full video walkthrough here you go.</p>

<style>.embed-container { position: relative; padding-bottom: 56.25%; height: 0; overflow: hidden; max-width: 100%; } .embed-container iframe, .embed-container object, .embed-container embed { position: absolute; top: 0; left: 0; width: 100%; height: 100%; }</style>
<div class="embed-container">    <iframe title="YouTube video player" width="640" height="390" src="//www.youtube.com/embed/0LK73MdhED4" frameborder="0" allowfullscreen=""></iframe></div>

<h2 id="conclusion">Conclusion</h2>

<p>This brings us to the end of this guide. Hopefully, you’ve been able to learn about upgrading your application to Angular v8 and NgRx v8. In addition, you should feel confident in taking advantage of some of the new features available in NgRx v8 to reduce the occurrence of what some might refer to as boilerplate. Happy updating and upgrading!</p>]]></content><author><name>Wesley Grimes</name></author><category term="angular" /><category term="angular" /><category term="ngrx" /><category term="javascript" /><category term="redux" /><summary type="html"><![CDATA[Do you have an awesome application written with Angular v7 using NgRx v7, but have been feeling left out will all the mentions online and at conferences about Angular v8 and NgRx v8? Well, you are in luck! Today we will explore together, how to upgrade our applications to use Angular v8 using the Angular CLI tooling. We will also explore upgrading to NgRx v8.]]></summary></entry><entry><title type="html">Managing File Uploads With NgRx</title><link href="https://wesleygrimes.com/angular/2019/04/01/managing-file-uploads-with-ngrx.html" rel="alternate" type="text/html" title="Managing File Uploads With NgRx" /><published>2019-04-01T10:00:00+00:00</published><updated>2019-04-01T10:00:00+00:00</updated><id>https://wesleygrimes.com/angular/2019/04/01/managing-file-uploads-with-ngrx</id><content type="html" xml:base="https://wesleygrimes.com/angular/2019/04/01/managing-file-uploads-with-ngrx.html"><![CDATA[<p><img src="/assets/post_headers/ngondestroy.jpg" alt="" /></p>

<p>In this article we will build a fully-functional file upload control, that is powered by <strong>Angular</strong> and is backed by an <strong>NgRx</strong> feature store. The control will provide the user with the following features:</p>

<ul>
  <li>The ability to upload files using the <code>&lt;input #file type="file" /&gt;</code> HTML element.</li>
  <li>The ability to see an accurate upload progress via the <code>reportProgress</code> <code>HttpClient</code> option.</li>
  <li>The ability to cancel in-process uploads</li>
</ul>

<p>As an added bonus, we will briefly dive into building the <em>server-side</em> ASP.NET Core WebAPI Controller that will handle the file uploads.</p>

<h2 id="before-we-get-started">Before We Get Started</h2>

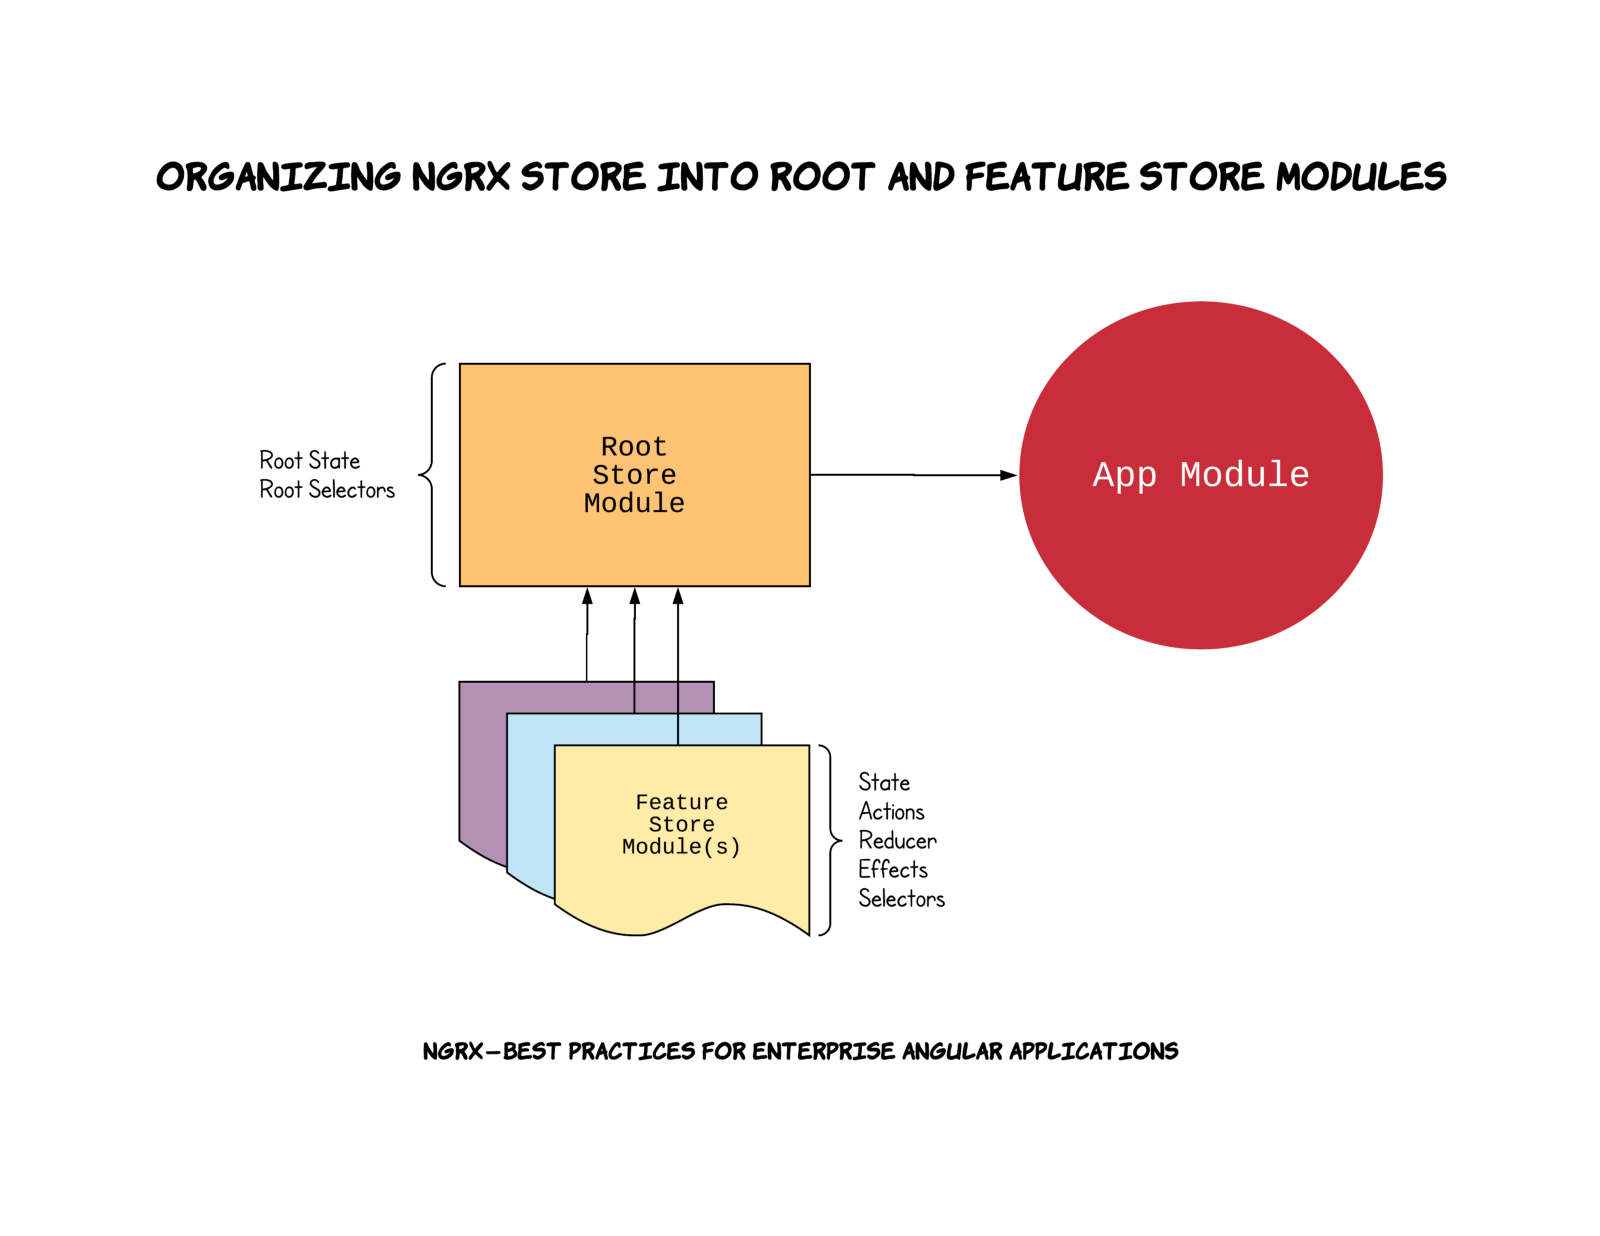
<p>In this article, I will show you how to manage file uploads using NgRx. If you are new to NgRx, then I highly recommend that you first read my article, <a href="https://wesleygrimes.com/angular/2018/05/30/ngrx-best-practices-for-enterprise-angular-applications.html">NgRx - Best Practices for Enterprise Angular Applications</a>. We will be using the techniques described in that article to build out the NgRx components for file uploads.</p>

<p>If you are new to Angular, then I recommend that you check out one of the following resources:</p>

<ul>
  <li><a href="https://bit.ly/2WubqhW">Ultimate Courses</a></li>
  <li><a href="https://angular.io/guide/router">Official Angular Docs</a></li>
  <li><a href="https://ngrx.io/docs">NgRx Docs</a></li>
</ul>

<h2 id="npm-package-versions">NPM Package Versions</h2>

<p>For context, this article assumes you are using the following <code>npm</code> <code>package.json</code> versions:</p>

<ul>
  <li><code>@angular/*</code>: 7.2.9</li>
  <li><code>@ngrx/*</code>: 7.3.0</li>
</ul>

<h2 id="prerequisites">Prerequisites</h2>

<p>Before diving into building the file upload control, make sure that you have the following in place:</p>

<ol>
  <li>An Angular 7+ application generated</li>
  <li>NgRx dependencies installed</li>
  <li>NgRx Store wired up in your application. <a href="https://wesleygrimes.com/angular/2018/05/30/ngrx-best-practices-for-enterprise-angular-applications.html">e.g. Follow this guide</a></li>
</ol>

<hr />

<h2 id="create-the-upload-file-service">Create the Upload File Service</h2>

<p>Let’s create a brand new service in <code>Angular</code>. This service will be responsible for handling the file upload from the client to the server backend. We will use the amazing <a href="https://angular.io/guide/http"><code>HttpClient</code></a> provided with <code>Angular</code>.</p>

<h3 id="generate-the-service">Generate the service</h3>

<pre><code class="language-shell">$ ng g service file-upload
</code></pre>

<h3 id="inject-the-httpclient">Inject the HttpClient</h3>

<p>Because we are using the <code>HttpClient</code> to make requests to the backend, we need to inject it into our service. Update the <code>constructor</code> line of code so that it looks as follows:</p>

<pre><code class="language-typescript">constructor(private httpClient: HttpClient) {}
</code></pre>

<h3 id="add-a-private-field-for-api_base_url">Add a private field for <code>API_BASE_URL</code></h3>

<blockquote>
  <p>I typically store <code>API</code> base URLs in the <code>src/environments</code> area. If you’re interested in learning more about <code>environments</code> in <code>Angular</code> then check out this great article: <a href="https://blog.angularindepth.com/becoming-an-angular-environmentalist-45a48f7c20d8">Becoming an Angular Environmentalist</a></p>
</blockquote>

<p>Let’s create a new private field named <code>API_BASE_URL</code> so that we can use this in our calls to the backend <code>API</code>.</p>

<p>One way to accomplish this would be to do the following:</p>

<pre><code class="language-typescript">import { environment } from 'src/environments/environment';
...
private API_BASE_URL = environment.apiBaseUrl;
</code></pre>

<h3 id="add-a-uploadfile-public-method">Add a uploadFile public method</h3>

<p>Let’s create a new public method named <code>uploadFile</code> to the service. The method will take in a parameter <code>file: File</code> and return an <code>Observable&lt;HttpEvent&lt;{}&gt;&gt;</code>.</p>

<blockquote>
  <p>Typically a <code>get</code> or <code>post</code> <code>Observable&lt;T&gt;</code> is returned from a service like this. However, in this situation we are going to actually return the raw <code>request</code> which is an <code>Observable&lt;HttpEvent&lt;{}&gt;&gt;</code>.</p>
</blockquote>

<blockquote>
  <p>By returning a raw <code>request</code> we have more control over the process, to pass options like <code>reportProgress</code> and allow cancellation of a <code>request</code>.</p>
</blockquote>

<pre><code class="language-typescript">public uploadFile(file: File): Observable&lt;HttpEvent&lt;{}&gt;&gt; {
  const formData = new FormData();
  formData.append('files', file, file.name);

  const options = {
    reportProgress: true
  };

  const req = new HttpRequest(
    'POST',
    `${this.API_BASE_URL}/api/file`,
    formData,
    options
  );
  return this.httpClient.request(req);
}
</code></pre>

<h3 id="completed-file-upload-service">Completed File Upload Service</h3>

<p>The completed <code>file-upload.service.ts</code> will look as follows:</p>

<pre><code class="language-typescript">import { HttpClient, HttpEvent, HttpRequest } from '@angular/common/http';
import { Injectable } from '@angular/core';
import { Observable } from 'rxjs';
import { environment } from 'src/environments/environment';

@Injectable({
  providedIn: 'root'
})
export class FileUploadService {
  private API_BASE_URL = environment.apiBaseUrl;

  constructor(private httpClient: HttpClient) {}

  public uploadFile(file: File): Observable&lt;HttpEvent&lt;{}&gt;&gt; {
    const formData = new FormData();
    formData.append('files', file, file.name);

    const options = {
      reportProgress: true
    };

    const req = new HttpRequest(
      'POST',
      `${this.API_BASE_URL}/api/file`,
      formData,
      options
    );
    return this.httpClient.request(req);
  }
}
</code></pre>

<h2 id="create-the-upload-file-feature-store">Create the Upload File Feature Store</h2>

<p>To keep your <strong>NgRx</strong> store organized, I recommend creating a separate Upload File Feature Store. Let’s bundle it all together in a module named <code>upload-file-store.module.ts</code> and keep it under a sub-directory named <code>upload-file-store</code>.</p>

<h3 id="create-feature-store-module">Create Feature Store Module</h3>

<p>Create a feature store module using the following command:</p>

<pre><code class="language-shell">$ ng g module upload-file-store --flat false
</code></pre>

<h3 id="create-state-interface">Create State Interface</h3>

<p>Create a new file underneath the <code>upload-file-store</code> folder, named <code>state.ts</code>. The contents of the file will be as follows:</p>

<blockquote>
  <p>We are using a relatively new technique in that we will set up an <code>enum</code> to track the status. This <code>enum</code> will reflect the current state of the upload process. For more information on this method, check out <a href="https://blog.angularindepth.com/ngrx-how-and-where-to-handle-loading-and-error-states-of-ajax-calls-6613a14f902d">Alex Okrushko’s article</a>.</p>
</blockquote>

<pre><code class="language-typescript">export enum UploadStatus {
  Ready = 'Ready',
  Requested = 'Requested',
  Started = 'Started',
  Failed = 'Failed',
  Completed = 'Completed'
}

export interface State {
  status: UploadStatus;
  error: string | null;
  progress: number | null;
}

export const initialState: State = {
  status: UploadStatus.Ready,
  error: null,
  progress: null
};
</code></pre>

<h3 id="create-feature-actions">Create Feature Actions</h3>

<blockquote>
  <p>If you would like to learn more about <strong>NgRx Actions</strong>, then check out the <a href="https://ngrx.io/guide/store/actions">official docs</a>.</p>
</blockquote>

<p>Create a new file underneath the <code>upload-file-store</code> folder, named <code>actions.ts</code>. This file will hold the actions we want to make available on this store.</p>

<p>We will create the following actions on our feature store:</p>

<ul>
  <li>
    <p><code>UPLOAD_REQUEST</code> - This action is dispatched from the file upload form, it’s payload will contain the actual <code>File</code> being uploaded.</p>
  </li>
  <li>
    <p><code>UPLOAD_CANCEL</code> - This action is dispatched from the file upload form when the cancel button is clicked. This will be used to cancel uploads in progress.</p>
  </li>
  <li>
    <p><code>UPLOAD_RESET</code> - This action is dispatched from the file upload form when the reset button is clicked. This will be used to reset the state of the store to defaults.</p>
  </li>
  <li>
    <p><code>UPLOAD_STARTED</code> - This action is dispatched from the file upload effect, <code>HttpClient</code> when the API reports the <code>HttpEventType.Sent</code> event.</p>
  </li>
  <li>
    <p><code>UPLOAD_PROGRESS</code> - This action is dispatched from the file upload effect, <code>HttpClient</code> when the API reports the <code>HttpEventType.UploadProgress</code> event. The payload will contain the progress percentage as a whole number.</p>
  </li>
  <li>
    <p><code>UPLOAD_FAILURE</code> - This action is dispatched from the file upload effect when the API returns an error, or there is an <code>HttpEventType.ResponseHeader</code> or <code>HttpEventType.Response</code> with an <code>event.status !== 200</code>, or when an unknown <code>HttpEventType</code> is returned. The payload will contain the specific error message returned from the API and place it into an <code>error</code> field on the store.</p>
  </li>
  <li>
    <p><code>UPLOAD_COMPLETED</code> - This action is dispatched from the file upload effect when the API reports a <code>HttpEventType.ResponseHeader</code> or <code>HttpEventType.Response</code> event <code>event.status === 200</code>. There is no payload as the API just returns a <code>200 OK</code> repsonse.</p>
  </li>
</ul>

<p>The final <code>actions.ts</code> file will look as follows:</p>

<pre><code class="language-typescript">import { Action } from '@ngrx/store';

export enum ActionTypes {
  UPLOAD_REQUEST = '[File Upload Form] Request',
  UPLOAD_CANCEL = '[File Upload Form] Cancel',
  UPLOAD_RESET = '[File Upload Form] Reset',
  UPLOAD_STARTED = '[File Upload API] Started',
  UPLOAD_PROGRESS = '[File Upload API] Progress',
  UPLOAD_FAILURE = '[File Upload API] Failure',
  UPLOAD_COMPLETED = '[File Upload API] Success'
}

export class UploadRequestAction implements Action {
  readonly type = ActionTypes.UPLOAD_REQUEST;
  constructor(public payload: { file: File }) {}
}

export class UploadCancelAction implements Action {
  readonly type = ActionTypes.UPLOAD_CANCEL;
}

export class UploadResetAction implements Action {
  readonly type = ActionTypes.UPLOAD_RESET;
}

export class UploadStartedAction implements Action {
  readonly type = ActionTypes.UPLOAD_STARTED;
}

export class UploadProgressAction implements Action {
  readonly type = ActionTypes.UPLOAD_PROGRESS;
  constructor(public payload: { progress: number }) {}
}

export class UploadFailureAction implements Action {
  readonly type = ActionTypes.UPLOAD_FAILURE;
  constructor(public payload: { error: string }) {}
}

export class UploadCompletedAction implements Action {
  readonly type = ActionTypes.UPLOAD_COMPLETED;
}

export type Actions =
  | UploadRequestAction
  | UploadCancelAction
  | UploadResetAction
  | UploadStartedAction
  | UploadProgressAction
  | UploadFailureAction
  | UploadCompletedAction;
</code></pre>

<h3 id="create-the-feature-reducer">Create the Feature Reducer</h3>

<blockquote>
  <p>If you would like to learn more about <strong>NgRx Reducers</strong>, then check out the <a href="https://ngrx.io/guide/store/reducers">official docs</a>.</p>
</blockquote>

<p>Create a new file underneath the <code>upload-file-store</code> folder, named <code>reducer.ts</code>. This file will hold the reducer we create to manage state transitions to the store.</p>

<p>We will handle state transitions as follows for the aforementioned actions:</p>

<ul>
  <li>
    <p><code>UPLOAD_REQUEST</code> - Reset the state, with the exception of setting <code>state.status</code> to <code>UploadStatus.Requested</code>.</p>
  </li>
  <li>
    <p><code>UPLOAD_CANCEL</code> - Reset the state tree. Our effect will listen for any <code>UPLOAD_CANCEL</code> event dispatches so a specific state field is not needed for this.</p>
  </li>
  <li>
    <p><code>UPLOAD_RESET</code> - Reset the state tree on this action.</p>
  </li>
  <li>
    <p><code>UPLOAD_FAILURE</code> - Reset the state tree, with the exception of setting <code>state.status</code> to <code>UploadStatus.Failed</code> and <code>state.error</code> to the <code>error</code> that was throw in the <code>catchError</code> from the <code>API</code> in the <code>uploadRequestEffect</code> effect.</p>
  </li>
  <li>
    <p><code>UPLOAD_STARTED</code> - Set <code>state.progress</code> to <code>0</code> and <code>state.status</code> to <code>UploadStatus.Started</code>.</p>
  </li>
  <li>
    <p><code>UPLOAD_PROGRESS</code> - Set <code>state.progress</code> to the current <code>action.payload.progress</code> provided from the action.</p>
  </li>
  <li>
    <p><code>UPLOAD_COMPLETED</code> - Reset the state tree, with the exception of setting <code>state.status</code> to <code>UploadStatus.Completed</code> so that the UI can display a success message.</p>
  </li>
</ul>

<pre><code class="language-typescript">import { Actions, ActionTypes } from './actions';
import { initialState, State, UploadStatus } from './state';

export function featureReducer(state = initialState, action: Actions): State {
  switch (action.type) {
    case ActionTypes.UPLOAD_REQUEST: {
      return {
        ...state,
        status: UploadStatus.Requested,
        progress: null,
        error: null
      };
    }
    case ActionTypes.UPLOAD_CANCEL: {
      return {
        ...state,
        status: UploadStatus.Ready,
        progress: null,
        error: null
      };
    }
    case ActionTypes.UPLOAD_RESET: {
      return {
        ...state,
        status: UploadStatus.Ready,
        progress: null,
        error: null
      };
    }
    case ActionTypes.UPLOAD_FAILURE: {
      return {
        ...state,
        status: UploadStatus.Failed,
        error: action.payload.error,
        progress: null
      };
    }
    case ActionTypes.UPLOAD_STARTED: {
      return {
        ...state,
        status: UploadStatus.Started,
        progress: 0
      };
    }
    case ActionTypes.UPLOAD_PROGRESS: {
      return {
        ...state,
        progress: action.payload.progress
      };
    }
    case ActionTypes.UPLOAD_COMPLETED: {
      return {
        ...state,
        status: UploadStatus.Completed,
        progress: 100,
        error: null
      };
    }
    default: {
      return state;
    }
  }
}
</code></pre>

<h3 id="create-the-feature-effects">Create the Feature Effects</h3>

<blockquote>
  <p>If you would like to learn more about <strong>NgRx Effects</strong>, then check out the <a href="https://ngrx.io/guide/effects">official docs</a>.</p>
</blockquote>

<p>Create a new file underneath the <code>upload-file-store</code> folder, named <code>effects.ts</code>. This file will hold the effects that we create to handle any side-effect calls to the backend <code>API</code> service. This effect is where most of the magic happens in the application.</p>

<h4 id="inject-dependencies">Inject Dependencies</h4>

<p>Let’s add the necessary dependencies to our <code>constructor</code> as follows:</p>

<pre><code class="language-typescript">constructor(
  private fileUploadService: FileUploadService,
  private actions$: Actions&lt;fromFileUploadActions.Actions&gt;
) {}
</code></pre>

<h4 id="add-a-new-upload-request-effect">Add a new Upload Request Effect</h4>

<blockquote>
  <p>Effects make heavy-use of <code>RxJS</code> concepts and topics. If you are new to <code>RxJS</code> then I suggest you check out the <a href="https://rxjs.dev">official docs</a></p>
</blockquote>

<p>Let’s create a new effect in the file named <code>uploadRequestEffect$</code>.</p>

<p>A couple comments about what this effect is going to do:</p>

<ul>
  <li>
    <p>Listen for the <code>UPLOAD_REQUEST</code> action and then make calls to the <code>fileUploadService.uploadFile</code> service method to initiate the upload process.</p>
  </li>
  <li>
    <p>Use the <a href="https://rxjs.dev/api/operators/concatMap"><code>concatMap</code></a> RxJS operator here so that multiple file upload requests are queued up and processed in the order they were dispatched.</p>
  </li>
  <li>
    <p>Use the <a href="https://rxjs.dev/api/operators/takeUntil"><code>takeUntil</code></a> RxJS operator listening for an <code>UPLOAD_CANCEL</code> action to be dispatched. This allows us to <strong>short-circuit</strong> any requests that are in-flight.</p>
  </li>
  <li>
    <p>Use the <a href="https://rxjs.dev/api/operators/map"><code>map</code></a> RxJS operator to map specific <code>HttpEvent</code> responses to dispatch specific <code>Actions</code> that we have defined in our <code>Store</code>.</p>
  </li>
  <li>
    <p>Use the <a href="https://rxjs.dev/api/operators/catchError"><code>catchError</code></a> RxJS operator to handle any errors that may be thrown from the <code>HttpClient</code>.</p>
  </li>
</ul>

<p>The effect will look something like this:</p>

<pre><code class="language-typescript">@Effect()
uploadRequestEffect$: Observable&lt;Action&gt; = this.actions$.pipe(
  ofType(fromFileUploadActions.ActionTypes.UPLOAD_REQUEST),
  concatMap(action =&gt;
    this.fileUploadService.uploadFile(action.payload.file).pipe(
      takeUntil(
        this.actions$.pipe(
          ofType(fromFileUploadActions.ActionTypes.UPLOAD_CANCEL)
        )
      ),
      map(event =&gt; this.getActionFromHttpEvent(event)),
      catchError(error =&gt; of(this.handleError(error)))
    )
  )
);
</code></pre>

<h4 id="add-the-getactionfromhttpevent-private-method">Add the getActionFromHttpEvent private method</h4>

<blockquote>
  <p>For more information on listening to progress events, check out the <a href="https://angular.io/guide/http#listening-to-progress-events">official docs guide from here</a>.</p>
</blockquote>

<p>This method will be responsible for mapping a specific <code>HttpEventType</code> to a specific <code>Action</code> that is dispatched.</p>

<ul>
  <li>
    <p><code>HttpEventType.Sent</code> - This event occurs when the upload process has begun. We will dispatch an <code>UPLOAD_STARTED</code> action to denote that the process has begun.</p>
  </li>
  <li>
    <p><code>HttpEventType.UploadProgress</code> - This event occurs when the upload process has made progress. We will dispatch an <code>UPLOAD_PROGRESS</code> action with a payload of <code>progress: Math.round((100 * event.loaded) / event.total)</code> to calculate the actual percentage complete of upload. This is because the <code>HttpClient</code> returns an <code>event.loaded</code> and <code>event.total</code> property in whole number format.</p>
  </li>
  <li>
    <p><code>HttpEventType.Response</code> / <code>HttpEventType.ResponseHeader</code> - These events occur when the upload process has finished. It is important to note that this could be a success or failure so we need to interrogate the <code>event.status</code> to check for <code>200</code>. We will dispatch the <code>UPLOAD_COMPLETED</code> action if <code>event.status === 200</code> and <code>UPLOAD_FAILURE</code> if the <code>event.status !== 200</code> passing the <code>event.statusText</code> as the error payload.</p>
  </li>
  <li>
    <p>All Others (default case) - We treat any other events that may be returned as an error because they are unexpected behavior. We will dispatch a <code>UPLOAD_FAILURE</code> action with a payload of the <code>event</code> run through <code>JSON.stringify</code>.</p>
  </li>
</ul>

<pre><code class="language-typescript">private getActionFromHttpEvent(event: HttpEvent&lt;any&gt;) {
  switch (event.type) {
    case HttpEventType.Sent: {
      return new fromFileUploadActions.UploadStartedAction();
    }
    case HttpEventType.UploadProgress: {
      return new fromFileUploadActions.UploadProgressAction({
        progress: Math.round((100 * event.loaded) / event.total)
      });
    }
    case HttpEventType.ResponseHeader:
    case HttpEventType.Response: {
      if (event.status === 200) {
        return new fromFileUploadActions.UploadCompletedAction();
      } else {
        return new fromFileUploadActions.UploadFailureAction({
          error: event.statusText
        });
      }
    }
    default: {
      return new fromFileUploadActions.UploadFailureAction({
        error: `Unknown Event: ${JSON.stringify(event)}`
      });
    }
  }
}
</code></pre>

<h4 id="add-the-handleerror-private-method">Add the handleError private method</h4>

<blockquote>
  <p>For more information on handling <code>HttpClient</code> errors, check out the <a href="https://angular.io/guide/http#getting-error-details">official docs guide from here</a>.</p>
</blockquote>

<p>This method will be responsible for handling any errors that may be thrown from the <code>HttpClient</code> during requests. I am making use of a neat library from npm named <code>serialize-error</code> to give me a predictable <code>error.message</code> no matter what type of error is thrown.</p>

<p>Install the library as so:</p>

<pre><code class="language-shell">$ npm install serialize-error
</code></pre>

<pre><code class="language-typescript">import serializeError from 'serialize-error';
...
private handleError(error: any) {
  const friendlyErrorMessage = serializeError(error).message;
  return new fromFileUploadActions.UploadFailureAction({
    error: friendlyErrorMessage
  });
}
</code></pre>

<h4 id="completed-feature-effect">Completed Feature Effect</h4>

<p>The completed effect will look something like this:</p>

<pre><code class="language-typescript">import { HttpEvent, HttpEventType } from '@angular/common/http';
import { Injectable } from '@angular/core';
import { Actions, Effect, ofType } from '@ngrx/effects';
import { Action } from '@ngrx/store';
import { Observable, of } from 'rxjs';
import { catchError, concatMap, map, takeUntil } from 'rxjs/operators';
import serializeError from 'serialize-error';
import { FileUploadService } from 'src/app/_services';
import * as fromFileUploadActions from './actions';

@Injectable()
export class UploadFileEffects {
  @Effect()
  uploadRequestEffect$: Observable&lt;Action&gt; = this.actions$.pipe(
    ofType(fromFileUploadActions.ActionTypes.UPLOAD_REQUEST),
    concatMap(action =&gt;
      this.fileUploadService.uploadFile(action.payload.file).pipe(
        takeUntil(
          this.actions$.pipe(
            ofType(fromFileUploadActions.ActionTypes.UPLOAD_CANCEL)
          )
        ),
        map(event =&gt; this.getActionFromHttpEvent(event)),
        catchError(error =&gt; of(this.handleError(error)))
      )
    )
  );

  constructor(
    private fileUploadService: FileUploadService,
    private actions$: Actions&lt;fromFileUploadActions.Actions&gt;
  ) {}

  private getActionFromHttpEvent(event: HttpEvent&lt;any&gt;) {
    switch (event.type) {
      case HttpEventType.Sent: {
        return new fromFileUploadActions.UploadStartedAction();
      }
      case HttpEventType.UploadProgress: {
        return new fromFileUploadActions.UploadProgressAction({
          progress: Math.round((100 * event.loaded) / event.total)
        });
      }
      case HttpEventType.ResponseHeader:
      case HttpEventType.Response: {
        if (event.status === 200) {
          return new fromFileUploadActions.UploadCompletedAction();
        } else {
          return new fromFileUploadActions.UploadFailureAction({
            error: event.statusText
          });
        }
      }
      default: {
        return new fromFileUploadActions.UploadFailureAction({
          error: `Unknown Event: ${JSON.stringify(event)}`
        });
      }
    }
  }

  private handleError(error: any) {
    const friendlyErrorMessage = serializeError(error).message;
    return new fromFileUploadActions.UploadFailureAction({
      error: friendlyErrorMessage
    });
  }
}
</code></pre>

<h3 id="create-the-feature-selectors">Create the Feature Selectors</h3>

<blockquote>
  <p>If you would like to learn more about <strong>NgRx Selectors</strong>, then check out the <a href="https://ngrx.io/guide/store/selectors">official docs</a>.</p>
</blockquote>

<p>Create a new file underneath the <code>upload-file-store</code> folder, named <code>selectors.ts</code>. This file will hold the selectors we will use to pull specific pieces of state out of the store. These are technically not required, but strongly encouraged. Selectors improve application performance with the use of the <code>MemoizedSelector</code> wrapper. Selectors also simplify UI logic.</p>

<p>We will create a selector for each significant property of the state. This includes the following properties:</p>

<ul>
  <li><code>state.status</code> - Since this is an <code>enum</code> we will create a selector for each <code>enum</code> choice.</li>
  <li><code>state.error</code></li>
  <li><code>state.progress</code></li>
</ul>

<p>The completed selectors file will look something like the following:</p>

<pre><code class="language-typescript">import {
  createFeatureSelector,
  createSelector,
  MemoizedSelector
} from '@ngrx/store';
import { State, UploadStatus } from './state';

const getError = (state: State): string =&gt; state.error;

const getStarted = (state: State): boolean =&gt;
  state.status === UploadStatus.Started;

const getRequested = (state: State): boolean =&gt;
  state.status === UploadStatus.Requested;

const getReady = (state: State): boolean =&gt; state.status === UploadStatus.Ready;

const getProgress = (state: State): number =&gt; state.progress;

const getInProgress = (state: State): boolean =&gt;
  state.status === UploadStatus.Started &amp;&amp; state.progress &gt;= 0;

const getFailed = (state: State): boolean =&gt;
  state.status === UploadStatus.Failed;

const getCompleted = (state: State): boolean =&gt;
  state.status === UploadStatus.Completed;

export const selectUploadFileFeatureState: MemoizedSelector&lt;
  object,
  State
&gt; = createFeatureSelector&lt;State&gt;('uploadFile');

export const selectUploadFileError: MemoizedSelector&lt;
  object,
  string
&gt; = createSelector(
  selectUploadFileFeatureState,
  getError
);

export const selectUploadFileReady: MemoizedSelector&lt;
  object,
  boolean
&gt; = createSelector(
  selectUploadFileFeatureState,
  getReady
);

export const selectUploadFileRequested: MemoizedSelector&lt;
  object,
  boolean
&gt; = createSelector(
  selectUploadFileFeatureState,
  getRequested
);

export const selectUploadFileStarted: MemoizedSelector&lt;
  object,
  boolean
&gt; = createSelector(
  selectUploadFileFeatureState,
  getStarted
);

export const selectUploadFileProgress: MemoizedSelector&lt;
  object,
  number
&gt; = createSelector(
  selectUploadFileFeatureState,
  getProgress
);

export const selectUploadFileInProgress: MemoizedSelector&lt;
  object,
  boolean
&gt; = createSelector(
  selectUploadFileFeatureState,
  getInProgress
);

export const selectUploadFileFailed: MemoizedSelector&lt;
  object,
  boolean
&gt; = createSelector(
  selectUploadFileFeatureState,
  getFailed
);

export const selectUploadFileCompleted: MemoizedSelector&lt;
  object,
  boolean
&gt; = createSelector(
  selectUploadFileFeatureState,
  getCompleted
);
</code></pre>

<h3 id="update-the-feature-module">Update the Feature Module</h3>

<p>We now need to update the feature module <code>UploadFileStoreModule</code> to wire-up the store.</p>

<p>The completed <code>UploadFileStoreModule</code> should look similar to this:</p>

<pre><code class="language-typescript">import { CommonModule } from '@angular/common';
import { NgModule } from '@angular/core';
import { EffectsModule } from '@ngrx/effects';
import { StoreModule } from '@ngrx/store';
import { UploadFileEffects } from './effects';
import { featureReducer } from './reducer';

@NgModule({
  declarations: [],
  imports: [
    CommonModule,
    StoreModule.forFeature('uploadFile', featureReducer),
    EffectsModule.forFeature([UploadFileEffects])
  ]
})
export class UploadFileStoreModule {}
</code></pre>

<h4 id="import-this-module-where-needed">Import this module where needed</h4>

<p>Make sure to import this new <code>UploadFileStoreModule</code> where it is needed. In this example, we will import this into the <code>AppModule</code> as we do not have any lazy-loaded features.</p>

<h4 id="update-your-appmodule-to-import-store--effects">Update your AppModule to import Store &amp; Effects</h4>

<p>Last, make sure that you update your <code>AppModule</code> to import the <code>StoreModule.forRoot</code> and <code>EffectsModule.forRoot</code>.</p>

<p>An updated <code>AppModule</code> may look as follows:</p>

<pre><code class="language-typescript">import { HttpClientModule } from '@angular/common/http';
import { NgModule } from '@angular/core';
import { BrowserModule } from '@angular/platform-browser';
import { EffectsModule } from '@ngrx/effects';
import { StoreModule } from '@ngrx/store';
import { StoreDevtoolsModule } from '@ngrx/store-devtools';
import { environment } from 'src/environments/environment';
import { AppComponent } from './app.component';
import { UploadFileStoreModule } from './upload-file-store/upload-file-store.module';

@NgModule({
  declarations: [AppComponent],
  imports: [
    BrowserModule,
    HttpClientModule,
    StoreModule.forRoot({}),
    EffectsModule.forRoot([]),
    StoreDevtoolsModule.instrument({
      maxAge: 25, // Retains last 25 states
      logOnly: environment.production // Restrict extension to log-only mode
    }),
    UploadFileStoreModule
  ],
  providers: [],
  bootstrap: [AppComponent]
})
export class AppModule {}
</code></pre>

<hr />

<h2 id="lets-review-so-far">Let’s Review So Far</h2>

<ul>
  <li>
    <p>Up to this point, we have created a new <code>FileUploadService</code> that calls our backend <code>API</code> to upload a <code>File</code> object.</p>
  </li>
  <li>
    <p>We have also created a new <code>UploadFileStore</code> feature store that provides <code>Actions</code>, a <code>Reducer</code>, <code>Effects</code>, and <code>Selectors</code> to manage the file upload process.</p>
  </li>
  <li>
    <p>Last, the store has been imported into our <code>AppModule</code> for use.</p>
  </li>
</ul>

<p>Now that we have the foundation laid out for us we can turn our attention to the user interface and wire-up a new component to the <code>UploadFileStore</code> that we created to manage our process.</p>

<p>This will be the fun part!</p>

<hr />

<h2 id="create-the-upload-file-component">Create the Upload File Component</h2>

<p>Let’s start by creating a brand-new <code>Component</code>. This component will consist of the following elements:</p>

<ul>
  <li>
    <p>An <code>input</code> element for the user to interact with to upload a file. The <code>change</code> event will dispatch the <code>UploadFileStoreActions.UploadRequest()</code> action</p>
  </li>
  <li>
    <p>A progress percentage to connected to the <code>UploadFileStoreSelectors.selectUploadFileProgress</code> selector for real-time progress</p>
  </li>
  <li>
    <p>A Cancel UPload button to dispatch the <code>UploadFileStoreActions.UploadCancelRequest()</code> action</p>
  </li>
  <li>
    <p>An Upload Another File button to dispatch the <code>UploadFileStoreActions.UploadResetRequest()</code> action and allow for a new file upload</p>
  </li>
</ul>

<blockquote>
  <p>SIDE NOTE: This would be a good scenario to create a connected container with a dumb component, but for the brevity of this article I will show these combined as one. In the example repository, I will show both scenarios.</p>
</blockquote>

<h3 id="generate-the-component">Generate the component</h3>

<blockquote>
  <p><a href="https://angular.io/cli">Click here</a> for more details on using the powerful Angular CLI</p>
</blockquote>

<pre><code class="language-shell">$ ng g component upload-file
</code></pre>

<blockquote>
  <p>For simplicity of this article we will just display the progress percentage, this could easily be adapted to hook into the <code>value</code> property of a progress bar control, like the Angular Material library provides.</p>
</blockquote>

<h3 id="update-the-component-ts-file">Update the component *.ts file</h3>

<h4 id="inject-the-store">Inject the Store</h4>

<p>We need to wire-up our store into this component for use. Let’s start by injecting the store into the <code>constructor</code>. The finished <code>constructor</code> should look something like this:</p>

<pre><code class="language-typescript">...
constructor(private store$: Store&lt;fromFileUploadState.State&gt;) {}
</code></pre>

<h4 id="wire-up-our-selectors-from-state">Wire-up our selectors from state</h4>

<p>Let’s create six (6) public fields on the component. A good practice is to place <code>$</code> as a suffix so that you know these are <code>Observable</code> and must be subscribed to in the template.</p>

<pre><code class="language-typescript">completed$: Observable&lt;boolean&gt;;
progress$: Observable&lt;number&gt;;
error$: Observable&lt;string&gt;;

isInProgress$: Observable&lt;boolean&gt;;
isReady$: Observable&lt;boolean&gt;;
hasFailed$: Observable&lt;boolean&gt;;
</code></pre>

<p>Let’s hook these up to the store in our <code>ngOnInit</code> life-cycle hook.</p>

<pre><code class="language-typescript">ngOnInit() {
  this.completed$ = this.store$.pipe(
    select(fromFileUploadSelectors.selectUploadFileCompleted)
  );

  this.progress$ = this.store$.pipe(
    select(fromFileUploadSelectors.selectUploadFileProgress)
  );

  this.error$ = this.store$.pipe(
    select(fromFileUploadSelectors.selectUploadFileError)
  );

  this.isInProgress$ = this.store$.pipe(
    select(fromFileUploadSelectors.selectUploadFileInProgress)
  );

  this.isReady$ = this.store$.pipe(
    select(fromFileUploadSelectors.selectUploadFileReady)
  );

  this.hasFailed$ = this.store$.pipe(
    select(fromFileUploadSelectors.selectUploadFileFailed)
  );
}
</code></pre>

<h4 id="wire-up-our-action-dispatchers">Wire-up our action dispatchers</h4>

<p>Let’s add <code>uploadFile</code>, <code>resetUpload</code>, and <code>cancelUpload</code> methods to connect our button clicks to dispatch actions in the store.</p>

<pre><code class="language-typescript">uploadFile(event: any) {
  const files: FileList = event.target.files;
  const file = files.item(0);

  this.store$.dispatch(
    new fromFileUploadActions.UploadRequestAction({
      file
    })
  );

  // clear the input form
  event.srcElement.value = null;
}

resetUpload() {
  this.store$.dispatch(new UploadFileStoreActions.UploadResetAction());
}

cancelUpload() {
  this.store$.dispatch(new UploadFileStoreActions.UploadCancelAction());
}
</code></pre>

<h4 id="finished-component-ts-file">Finished Component *.ts file</h4>

<p>The finished component *.ts file should look similar to the following:</p>

<pre><code class="language-typescript">import { Component, OnInit } from '@angular/core';
import { select, Store } from '@ngrx/store';
import { Observable } from 'rxjs';
import * as fromFileUploadActions from 'src/app/upload-file-store/actions';
import * as fromFileUploadSelectors from 'src/app/upload-file-store/selectors';
import * as fromFileUploadState from 'src/app/upload-file-store/state';

@Component({
  selector: 'app-upload-file',
  templateUrl: './upload-file.component.html',
  styleUrls: ['./upload-file.component.css']
})
export class UploadFileComponent implements OnInit {
  completed$: Observable&lt;boolean&gt;;
  progress$: Observable&lt;number&gt;;
  error$: Observable&lt;string&gt;;
  isInProgress$: Observable&lt;boolean&gt;;
  isReady$: Observable&lt;boolean&gt;;
  hasFailed$: Observable&lt;boolean&gt;;

  constructor(private store$: Store&lt;fromFileUploadState.State&gt;) {}

  ngOnInit() {
    this.completed$ = this.store$.pipe(
      select(fromFileUploadSelectors.selectUploadFileCompleted)
    );

    this.progress$ = this.store$.pipe(
      select(fromFileUploadSelectors.selectUploadFileProgress)
    );

    this.error$ = this.store$.pipe(
      select(fromFileUploadSelectors.selectUploadFileError)
    );

    this.isInProgress$ = this.store$.pipe(
      select(fromFileUploadSelectors.selectUploadFileInProgress)
    );

    this.isReady$ = this.store$.pipe(
      select(fromFileUploadSelectors.selectUploadFileReady)
    );

    this.hasFailed$ = this.store$.pipe(
      select(fromFileUploadSelectors.selectUploadFileFailed)
    );
  }

  uploadFile(event: any) {
    const files: FileList = event.target.files;
    const file = files.item(0);

    this.store$.dispatch(
      new fromFileUploadActions.UploadRequestAction({
        file
      })
    );

    // clear the input form
    event.srcElement.value = null;
  }

  resetUpload() {
    this.store$.dispatch(new fromFileUploadActions.UploadResetAction());
  }

  cancelUpload() {
    this.store$.dispatch(new fromFileUploadActions.UploadCancelAction());
  }
}
</code></pre>

<h3 id="update-the-component-html-template">Update the component *.html template</h3>

<p>We are going to add five (5) major parts to our upload file component.</p>

<h4 id="add-the-input-field">Add the input field</h4>

<p>There is no upload file button, rather we will make use of the built-in input component and hook to the <code>change</code> event. Any time a file is added to the form this event will fire. We also only want to display this form if we are accepting new files to be uploaded, i.e. it has failed or it is ready. We will use the <code>*ngIf</code> structural directive to help here referencing our <code>isReady$</code> and <code>hasFailed$</code> observables.</p>

<pre><code class="language-html">&lt;div class="message" *ngIf="(isReady$ | async) || (hasFailed$ | async)"&gt;
  &lt;input #file type="file" multiple (change)="uploadFile($event)" /&gt;
&lt;/div&gt;
</code></pre>

<h4 id="add-the-progress-message">Add the progress message</h4>

<p>This message will be displayed when the progress is greater than or equal to 0% and the <code>UploadStatus</code> is <code>Failed</code>. We will use <code>*ngIf</code> to only display if it’s in this state using the <code>isInProgress$</code> selector value. We will set the text of the progress message to the <code>progress$</code> selector value.</p>

<pre><code class="language-html">&lt;div class="message" *ngIf="(isInProgress$ | async)"&gt;
  &lt;div style="margin-bottom: 14px;"&gt;Uploading... %&lt;/div&gt;
&lt;/div&gt;
</code></pre>

<h4 id="add-the-cancel-upload-button">Add the Cancel Upload button</h4>

<p>This button will utilize the <code>*ngIf</code> to only display if the upload is in progress using the <code>isInProgress$</code> selector value. The click event will trigger the dispatch of the <code>UploadCancelAction</code>.</p>

<pre><code class="language-html">&lt;div class="message" *ngIf="(isInProgress$ | async)"&gt;
  &lt;button (click)="cancelUpload()"&gt;Cancel Upload&lt;/button&gt;
&lt;/div&gt;
</code></pre>

<h4 id="add-the-reset-upload-button">Add the Reset Upload button</h4>

<p>This button will utilize the <code>*ngIf</code> to only display if the upload is complete using the <code>completed$</code> selector value. The click event will trigger the dispatch of the <code>UploadResetAction</code>.</p>

<pre><code class="language-html">&lt;div class="message" *ngIf="(completed$ | async)"&gt;
  &lt;h4&gt;
    File has been uploaded successfully!
  &lt;/h4&gt;
  &lt;button (click)="resetUpload()"&gt;Upload Another File&lt;/button&gt;
&lt;/div&gt;
</code></pre>

<h4 id="add-the-error-message">Add the Error message</h4>

<p>This button will utilize the <code>*ngIf</code> to only display if <code>hasFailed$</code> selector value returns <code>true</code>. The actual error message is pulled from the <code>error$</code> selector value.</p>

<pre><code class="language-html">&lt;div class="message error" *ngIf="(hasFailed$ | async)"&gt;
  Error: 
&lt;/div&gt;
</code></pre>

<h4 id="finished-component-html-file">Finished Component *.html file</h4>

<pre><code class="language-html">&lt;div class="message" *ngIf="(isReady$ | async) || (hasFailed$ | async)"&gt;
  &lt;input #file type="file" multiple (change)="uploadFile($event)" /&gt;
&lt;/div&gt;

&lt;div class="message" *ngIf="(isInProgress$ | async)"&gt;
  &lt;div style="margin-bottom: 14px;"&gt;Uploading... %&lt;/div&gt;
&lt;/div&gt;

&lt;div class="message" *ngIf="(isInProgress$ | async)"&gt;
  &lt;button (click)="cancelUpload()"&gt;Cancel Upload&lt;/button&gt;
&lt;/div&gt;

&lt;div class="message" *ngIf="(completed$ | async)"&gt;
  &lt;h4&gt;
    File has been uploaded successfully!
  &lt;/h4&gt;
  &lt;button (click)="resetUpload()"&gt;Upload Another File&lt;/button&gt;
&lt;/div&gt;

&lt;div class="message error" *ngIf="(hasFailed$ | async)"&gt;
  Error: 
&lt;/div&gt;
</code></pre>

<h3 id="add-some-styles-to-our-component-css-file">Add some styles to our Component *.css file</h3>

<p>For formatting let’s add a few simple classes to our component stylesheet:</p>

<pre><code class="language-css">.message {
  margin-bottom: 15px;
}

.error {
  color: red;
}
</code></pre>

<h2 id="add-the-component-to-our-appcomponent">Add the Component to our AppComponent</h2>

<p>For the purposes of this article we will add our new <code>UploadFileComponent</code> component to our <code>AppComponent</code>. The template will look as follows:</p>

<pre><code class="language-html">&lt;app-upload-file&gt;&lt;/app-upload-file&gt;
</code></pre>

<hr />

<h2 id="bonus-feature-back-end-rest-endpoint">(Bonus Feature) Back-end REST Endpoint</h2>

<p>For a full mock back-end server checkout my [repository here:</p>

<ul>
  <li><a href="https://github.com/wesleygrimes/aspnetcore-mock-file-upload-server">github.com/wesleygrimes/aspnetcore-mock-file-upload-server</a></li>
</ul>

<p>For those of you brave souls that have made it this far… You might be asking what the backend <code>API</code> endpoint looks like. Well, here’s an example <code>ASP.NET Core</code> <code>Controller</code> offered free of charge ;-)</p>

<pre><code class="language-csharp">public class FileController : ControllerBase
{
    [HttpPost("")]
    public async Task&lt;IActionResult&gt; Post(List&lt;IFormFile&gt; files)
    {
        try
        {
            foreach (var file in files)
            {
                Console.WriteLine($"Begin Uploaded File: {file.FileName}");

                //simulate upload
                Task.Delay(5000).Wait();

                Console.WriteLine($"Finished Uploaded File: {file.FileName}");
            }

            return Ok();
        }
        catch (Exception ex)
        {
            return BadRequest($"Unable to upload file(s).");
        }
    }
}
</code></pre>

<h2 id="github-example-repository">GitHub Example Repository</h2>

<p>I always like to provide working code examples that follow the article. You can find this articles companion application at the following repository:</p>

<ul>
  <li><a href="https://github.com/wesleygrimes/ngrx-file-upload">github.com/wesleygrimes/ngrx-file-upload</a></li>
</ul>

<h2 id="conclusion">Conclusion</h2>

<p>It’s important to remember that I have implemented these best practices in several “real world” applications. While I have found these best practices helpful, and maintainable, I do not believe they are an end-all-be-all solution to your NgRx projects; it’s just what has worked for me. I am curious as to what you all think? Please feel free to offer any suggestions, tips, or best practices you’ve learned when building enterprise Angular applications with NgRx and I will update the article to reflect as such. Happy Coding!</p>

<hr />

<h2 id="additional-resources">Additional Resources</h2>

<p>I would highly recommend enrolling in the Ultimate Angular courses, especially the NgRx course. It is well worth the money and I have used it as a training tool for new Angular developers. Follow the link below to signup.</p>

<p><a href="https://bit.ly/2WubqhW">Ultimate Courses: Expert online courses in JavaScript, Angular, NGRX and TypeScript</a></p>]]></content><author><name>Wesley Grimes</name></author><category term="angular" /><category term="angular" /><category term="javascript" /><category term="redux" /><category term="ngrx" /><summary type="html"><![CDATA[In this article we will build a fully-functional file upload control that is powered by Angular and is backed by an NgRx feature store.]]></summary></entry><entry><title type="html">A Deep Dive into Angular’s NgOnDestroy</title><link href="https://wesleygrimes.com/angular/2019/03/29/making-upgrades-to-angular-ngondestroy.html" rel="alternate" type="text/html" title="A Deep Dive into Angular’s NgOnDestroy" /><published>2019-03-29T10:34:51+00:00</published><updated>2019-03-29T10:34:51+00:00</updated><id>https://wesleygrimes.com/angular/2019/03/29/making-upgrades-to-angular-ngondestroy</id><content type="html" xml:base="https://wesleygrimes.com/angular/2019/03/29/making-upgrades-to-angular-ngondestroy.html"><![CDATA[<p><img src="/assets/post_headers/ngondestroy.jpg" alt="" /></p>

<p>This article is a continuation of an Angular Hot Tip tweet that I sent out earlier this week. It became widely popular and generated quite a discussion. The concepts explored in this article reflect that discussion, so you should probably take some time and go check it out here:</p>

<div class="jekyll-twitter-plugin"><p>There was a 'Not Found' error fetching URL: 'https://twitter.com/wesgrimes/status/1110603853089701888'</p></div>

<p>As an extension of the above mentioned tweet, we will discuss limitations with how and when <code>ngOnDestroy</code> is called. We will also discuss ways to overcome those limitations. If you are new to Angular, or new to lifecycle methods in Angular, then I suggest you check out the <a href="https://angular.io/guide/lifecycle-hooks">official docs here</a>.</p>

<hr />

<h2 id="npm-package-versions">NPM Package Versions</h2>

<p>For context, this article assumes you are using the following <code>npm</code> <code>package.json</code> versions:</p>

<ul>
  <li><code>@angular/*</code>: 7.2.9</li>
</ul>

<hr />

<h2 id="a-brief-primer-on-ngondestroy">A Brief Primer On NgOnDestroy</h2>

<p>Before we dig too deep, let’s take a few minutes and review <code>ngOnDestroy</code>.</p>

<p>NgOnDestroy is a lifecycle method that can be added by implementing <code>OnDestroy</code> on the class and adding a new class method named <code>ngOnDestroy</code>. It’s primary purpose according to the <a href="https://angular.io/guide/lifecycle-hooks#lifecycle-sequence">Angular Docs</a> is to “Cleanup just before Angular destroys the directive/component. Unsubscribe Observables and detach event handlers to avoid memory leaks. Called just before Angular destroys the directive/component.”</p>

<h3 id="a-leaky-myvaluecomponent">A Leaky MyValueComponent</h3>

<p>Let’s imagine that we have a component named <code>MyValueComponent</code> that subscribes to a value from <code>MyService</code> in the <code>ngOnInit</code> method:</p>

<pre><code class="language-typescript">import { Component, OnInit } from '@angular/core';
import { MyService } from './my.service';

@Component({
  selector: 'app-my-value',
  templateUrl: './my-value.component.html',
  styleUrls: [ './my-value.component.css' ]
})
export class MyValueComponent implements OnInit {
  myValue: string;

  constructor(private myService: MyService) {}

  ngOnInit() {
      this.myService.getValue().subscribe(value =&gt; this.myValue = value);
  }
}
</code></pre>

<p>If this component is created and destroyed multiple times in the lifecycle of an Angular application, each time it’s created the <code>ngOnInit</code> would be called creating a brand new subscription. This could quickly get out of hand, with our value being updated exponentially. This is creating what is called a “memory leak”. Memory leaks can wreak havoc on the performance of an application and in addition add unpredictable or unintended behaviors. Let’s read on to learn how to plug this leak.</p>

<h3 id="fixing-the-leak-on-myvaluecomponent">Fixing the Leak on MyValueComponent</h3>

<p>To fix the memory leak we need to augment the component class with an implementation of <code>OnDestroy</code> and <code>unsubscribe</code> from the subscription. Let’s update our component adding the following:</p>

<ul>
  <li>Add <code>OnDestroy</code> to the typescript <code>import</code></li>
  <li>Add <code>OnDestroy</code> to the <code>implements</code> list</li>
  <li>Create a class field named <code>myValueSub: Subscription</code> to track our subscription</li>
  <li>Set <code>this.myValueSub</code> equal to the value of <code>this.myService.getValue().subscription</code></li>
  <li>Create a new class method named <code>ngOnDestroy</code></li>
  <li>Call <code>this.myValueSub.unsubscribe()</code> within <code>ngOnDestroy</code> if a subscription has been set.</li>
</ul>

<p>The updated component will look something like this:</p>

<pre><code class="language-typescript">import { Component, OnInit, OnDestroy } from '@angular/core';
import { MyService } from './my.service';

@Component({
  selector: 'app-my-value',
  templateUrl: './my-value.component.html',
  styleUrls: [ './my-value.component.css' ]
})
export class MyValueComponent implements OnInit, OnDestroy {
  myValue: string;
  myValueSub: Subscription;

  constructor(private myService: MyService) {}

  ngOnInit() {
      this.myValueSub = this.myService.getValue().subscribe(value =&gt; this.myValue = value);
  }

  ngOnDestroy() {
    if (this.myValueSub) {
        this.myValueSub.unsubscribe();
    }
  }
}
</code></pre>

<h3 id="moving-beyond-memory-leaks">Moving Beyond Memory Leaks</h3>

<p>Great! Now you have some background on <code>ngOnDestroy</code> and how cleaning up memory leaks is the primary use case for this lifecycle method. But what if you want to take it a step further and add additional cleanup logic? How about making server-side cleanup calls? Maybe preventing user navigation away?</p>

<p>As you read on we will discuss three methods to upgrade your <code>ngOnDestroy</code> for optimum use.</p>

<hr />

<h2 id="hot-tip-1---making-ngondestroy-async">Hot Tip #1 - Making NgOnDestroy Async</h2>

<p>As with other lifecycle methods in Angular, you can modify <code>ngOnDestroy</code> with <code>async</code>. This will allow you to make calls to methods returning a <code>Promise</code>. This can be a powerful way to manage cleanup activities in your application. As you read on we will explore an example of this.</p>

<h3 id="adding-logic-to-call-authservicelogout-from-ngondestroy">Adding logic to call AuthService.logout from ngOnDestroy</h3>

<p>Let’s pretend that you need to perform a server-side logout when <code>MyValueComponent</code> is destroyed. To do so we would update the method as follows:</p>

<ul>
  <li>Add <code>AuthService</code> to your <code>imports</code></li>
  <li>Add <code>AuthService</code> to your <code>constructor</code></li>
  <li>Add <code>async</code> in front of the method name <code>ngOnDestroy</code></li>
  <li>Make a call to an <code>AuthService</code> to <code>logout</code> using the <code>await</code> keyword.</li>
</ul>

<p>Your updated <code>MyValueComponent</code> will look something like this:</p>

<pre><code class="language-typescript">import { Component, OnInit, OnDestroy } from '@angular/core';
import { MyService } from './my.service';
import { AuthService } from './auth.service';

@Component({
  selector: 'app-my-value',
  templateUrl: './my-value.component.html',
  styleUrls: [ './my-value.component.css' ]
})
export class MyValueComponent implements OnInit, OnDestroy {
  myValue: string;
  myValueSub: Subscription;

  constructor(private myService: MyService, private authService: AuthService) {}

  ngOnInit() {
      this.myValueSub = this.myService.getValue().subscribe(value =&gt; this.myValue = value);
  }

  async ngOnDestroy() {
    if (this.myValueSub) {
        this.myValueSub.unsubscribe();
    }

    await this.authService.logout();
  }
}
</code></pre>

<p>Tada! Now when the component is destroyed an <code>async</code> call will be made to log the user out and destroy their session on the server.</p>

<h2 id="hot-tip-2---ensure-execution-during-browser-events">Hot Tip #2 - Ensure Execution During Browser Events</h2>

<p>Many developers are surprised to learn that <code>ngOnDestroy</code> is only fired when the class which it has been implemented on is destroyed within the context of a running browser session.</p>

<p>In other words, <code>ngOnDestroy</code> is <em>not</em> reliably called in the following scenarios:</p>

<ul>
  <li>Page Refresh</li>
  <li>Tab Close</li>
  <li>Browser Close</li>
  <li>Navigation Away From Page</li>
</ul>

<p>This could be a deal-breaker when thinking about the prior example of logging the user out on destroy. Why? Well, most users would simply close the browser session or navigate to another site. So how do we make sure to capture or hook into that activity if <code>ngOnDestroy</code> doesn’t work in those scenarios?</p>

<h3 id="decorating-ngondestroy-with-hostlistener">Decorating ngOnDestroy with HostListener</h3>

<blockquote>
  <p>TypeScript decorators are used throughout Angular applications. More information can be found here in the <a href="https://www.typescriptlang.org/docs/handbook/decorators.html">official TypeScript docs</a>.</p>
</blockquote>

<p>To ensure that our <code>ngOnDestroy</code> is executed in the above mentioned browser events, we can add one simple line of code to the top of <code>ngOnDestroy</code>. Let’s continue with our previous example of <code>MyValueComponent</code> and decorate <code>ngOnDestroy</code>:</p>

<ul>
  <li>Add <code>HostListener</code> to the <code>imports</code></li>
  <li>Place <code>@HostListener('window:beforeunload')</code> on top of <code>ngOnDestroy</code></li>
</ul>

<p>Our updated <code>MyValueComponent</code> will look something like this:</p>

<pre><code class="language-typescript">import { Component, OnInit, OnDestroy, HostListener } from '@angular/core';
import { MyService } from './my.service';
import { AuthService } from './auth.service';

@Component({
  selector: 'app-my-value',
  templateUrl: './my-value.component.html',
  styleUrls: [ './my-value.component.css' ]
})
export class MyValueComponent implements OnInit, OnDestroy {
  myValue: string;
  myValueSub: Subscription;

  constructor(private myService: MyService, private authService: AuthService) {}

  ngOnInit() {
      this.myValueSub = this.myService.getValue().subscribe(value =&gt; this.myValue = value);
  }

  @HostListener('window:beforeunload')
  async ngOnDestroy() {
    if (this.myValueSub) {
        this.myValueSub.unsubscribe();
    }

    await this.authService.logout();
  }
}
</code></pre>

<p>Now our <code>ngOnDestroy</code> method is called both when the component is destroyed by Angular AND when the browser event <code>window:beforeunload</code> is fired. This is a powerful combination!</p>

<h3 id="more-about-hostlistener">More about HostListener</h3>

<p><code>@HostListener()</code> is an Angular decorator that can be placed on top of any class method. This decorator takes two arguments: <code>eventName</code> and optionally <code>args</code>. In the above example, we are passing <code>window:beforeunload</code> as the DOM event. This means that Angular will automatically call our method when the DOM event <code>window:beforeunload</code> is fired. For more information on <code>@HostListener</code> check out the <a href="https://angular.io/api/core/HostListener">official docs</a>.</p>

<p>If you want to use this to prevent navigation away from a page or component then:</p>

<ul>
  <li>Add <code>$event</code> to the <code>@HostListener</code> arguments</li>
  <li>Call <code>event.preventDefault()</code></li>
  <li>Set <code>event.returnValue</code> to a string value of the message you would like the browser to display</li>
</ul>

<p>An example would look something like this:</p>

<pre><code class="language-typescript">@HostListener('window:beforeunload', ['$event'])
async ngOnDestroy($event) {
  if (this.myValueSub) {
    this.myValueSub.unsubscribe();
  }

  await this.authService.logout();

  $event.preventDefault();
  $event.returnValue = 'A message.';
}
</code></pre>

<blockquote>
  <p>PLEASE NOTE: This is not officially supported by Angular! <code>OnDestroy</code> and <code>ngOnDestroy</code> suggest that there is no input argument on <code>ngOnDestroy</code> allowed. While unsupported, it does in fact still function as normal.</p>
</blockquote>

<h3 id="more-about-windowbeforeunload">More about window:beforeunload</h3>

<p><code>window:beforeunload</code> is an event fired right before the <code>window</code> is unloaded. More details can be found in the documentation here: https://developer.mozilla.org/en-US/docs/Web/API/Window/beforeunload_event.</p>

<p>A couple points to be aware of:</p>

<ul>
  <li>
    <p>This event is currently supported in all major browsers EXCEPT iOS Safari.</p>
  </li>
  <li>
    <p>If you need this functionality in iOS Safari then consider reviewing this <a href="https://stackoverflow.com/questions/14645011/window-onbeforeunload-and-window-onunload-is-not-working-in-firefox-safari-o/14647730#14647730">Stack Overflow thread</a>.</p>
  </li>
  <li>
    <p>If you are using this event in an attempt to block navigation away you must set the <code>event.returnValue</code> to a string of the message you would like to display. More details in this <a href="https://developer.mozilla.org/en-US/docs/Web/API/Window/beforeunload_event#Examples">example</a>.</p>
  </li>
</ul>

<h2 id="conclusion">Conclusion</h2>

<p>I realize that some of the tips recommended in this article are not mainstream and may generate some concern. Please remember as always to try these out and see if they fit for what you are doing in your application. If they work great! If not, then it’s ok to move on.</p>

<p>If you have any comments or questions feel free to contact me on <a href="https://twitter.com/wesgrimes">Twitter</a></p>

<hr />

<h2 id="additional-resources">Additional Resources</h2>

<p>I would highly recommend enrolling in the Ultimate Angular courses. It is well worth the money and I have used it as a training tool for new and experienced Angular developers. Follow the link below to signup.</p>

<p><a href="https://bit.ly/2WubqhW">Ultimate Courses: Expert online courses in JavaScript, Angular, NGRX and TypeScript</a></p>]]></content><author><name>Wesley Grimes</name></author><category term="angular" /><category term="angular" /><category term="javascript" /><category term="enterprise" /><category term="typescript" /><category term="dom" /><category term="lifecycle" /><summary type="html"><![CDATA[We will discuss limitations with how and when `ngOnDestroy` is called. We will also discuss ways to overcome those limitations using async and HostListener.]]></summary></entry><entry><title type="html">Angular Routing - Best Practices for Enterprise Applications</title><link href="https://wesleygrimes.com/angular/2019/02/24/angular-routing-best-practices-for-enterprise-applications.html" rel="alternate" type="text/html" title="Angular Routing - Best Practices for Enterprise Applications" /><published>2019-02-24T10:34:51+00:00</published><updated>2019-02-24T10:34:51+00:00</updated><id>https://wesleygrimes.com/angular/2019/02/24/angular-routing-best-practices-for-enterprise-applications</id><content type="html" xml:base="https://wesleygrimes.com/angular/2019/02/24/angular-routing-best-practices-for-enterprise-applications.html"><![CDATA[<p><img src="/assets/post_headers/routing.jpg" alt="" /></p>

<h2 id="before-we-get-started">Before We Get Started</h2>

<p>This article is not intended to be a tutorial on routing in Angular. If you are new to Routing in Angular then I highly recommend you check out one of the the following resources:</p>

<ul>
  <li><a href="https://bit.ly/2WubqhW">Ultimate Courses</a></li>
  <li><a href="https://angular.io/guide/router">Official Angular Docs</a></li>
</ul>

<h2 id="background">Background</h2>

<p>The following represents a pattern that I’ve developed at my day job after building several enterprise Angular applications. While most online tutorials do a great job laying out the fundamentals, I had a hard time locating articles that showed recommended conventions and patterns for large and scalable applications.</p>

<p>With this pattern you should have a clean and concise organization for all routing related concerns in your applications.</p>

<h2 id="prerequisites">Prerequisites</h2>

<p>For context, this article assumes you are using the following version of Angular:</p>

<ul>
  <li>Angular v7.2.6</li>
</ul>

<hr />

<h2 id="best-practice-1---create-a-top-level-routes-array-file">Best Practice #1 - Create a top-level Routes array file</h2>

<blockquote>
  <p>The official <a href="https://angular.io/guide/router#refactor-the-routing-configuration-into-a-routing-module">Angular docs recommend</a> creating a full-blown <code>app-routing.module.ts</code> for your top-level routing. I have found this extra layer to be unnecessary in most cases.</p>
</blockquote>

<blockquote>
  <p>HOT TIP: Only register top-level routes here, if you plan to implement feature modules, then the child routes would live underneath the respective <code>feature.routes.ts</code> file. We want to keep this top-level routes file as clean as possible and follow the component tree structure.</p>
</blockquote>

<p>Let’s go with the following approach:</p>

<ol>
  <li>
    <p>Create a new file named <code>app.routes.ts</code> in the root <code>src/app</code> directory. This file will hold our top-level <code>Routes</code> array. We will come back later throughout the article and fill this in. For now, let’s scaffold it with the following contents:</p>

    <pre><code class="language-typescript"> import { Routes } from '@angular/router';

 export const AppRoutes: Routes = [];
</code></pre>
  </li>
  <li>
    <p>Register <code>AppRoutes</code> in the <code>app.module.ts</code> file.</p>

    <ul>
      <li>Import <code>AppRoutes</code> from <code>app.routes.ts</code>.</li>
      <li>Import <code>RouterModule</code> from <code>@angular/router</code>.</li>
      <li>Add <code>RouterModule.forRoot(AppRoutes)</code> to your <code>imports</code> array</li>
    </ul>

    <p>Your updated <code>app.module.ts</code> will look similar to the following:</p>

    <pre><code class="language-typescript"> import { NgModule } from '@angular/core';
 import { BrowserModule } from '@angular/platform-browser';
 import { RouterModule } from '@angular/router';
 import { AppComponent } from './app.component';
 import { AppRoutes } from './app.routes';

 @NgModule({
   declarations: [AppComponent],
   imports: [BrowserModule, RouterModule.forRoot(AppRoutes)],
   providers: [],
   bootstrap: [AppComponent]
 })
 export class AppModule {}
</code></pre>
  </li>
</ol>

<h2 id="best-practice-2---create-a-feature-level-routes-array-file">Best Practice #2 - Create a feature-level Routes array file</h2>

<p>In similar fashion to how we constructed the <code>app.routes.ts</code> we will create a <code>feature.routes.ts</code> to list out the individual routes for this feature module. We want to keep our routes as close to the source as possible. This will be in keeping with a clean code approach, and having a good separation of concerns.</p>

<ol>
  <li>
    <p>Create a new file named <code>feature/feature.routes.ts</code> where <code>feature</code> matches the name of your <code>feature.module.ts</code> prefix. This file will hold our feature-level <code>Routes</code> array. Keeping in mind that you would replace <code>Feature</code> with the actual name of your module, let’s scaffold it with the following contents:</p>

    <pre><code class="language-typescript"> import { Routes } from '@angular/router';

 export const FeatureRoutes: Routes = [];
</code></pre>
  </li>
  <li>
    <p>Register <code>FeatureRoutes</code> in the <code>feature/feature.module.ts</code> file. We will make use of the <code>RouterModule.forChild</code> import so that these routes are automatically registered with lazy loading.</p>

    <ul>
      <li>Import <code>FeatureRoutes</code> from <code>feature.routes.ts</code>.</li>
      <li>Import <code>RouterModule</code> from <code>@angular/router</code>.</li>
      <li>Add <code>RouterModule.forChild(FeatureRoutes)</code> to your <code>imports</code> array</li>
    </ul>

    <p>Your updated <code>feature/feature.module.ts</code> will look similar to the following:</p>

    <pre><code class="language-typescript"> import { CommonModule } from '@angular/common';
 import { NgModule } from '@angular/core';
 import { RouterModule } from '@angular/router';
 import { FeatureRoutes } from './feature.routes';

 @NgModule({
   declarations: [],
   imports: [CommonModule, RouterModule.forChild(FeatureRoutes)]
 })
 export class FeatureModule {}
</code></pre>

    <p>An example of a <code>feature.routes.ts</code> file with child route(s) may look like the following:</p>

    <pre><code class="language-typescript"> import { Routes } from '@angular/router';
 import { FeatureOneComponent } from './feature-one.component';
 import { FeatureSpecificCanActivateGuard } from './_guards';

 export const FeatureOneRoutes: Routes = [
   {
     path: '',
     pathMatch: 'full',
     redirectTo: 'feature-one-component'
   },
   {
     path: 'feature-one-component',
     component: FeatureOneComponent,
     canActivate: [FeatureSpecificCanActivateGuard]
   }
 ];
</code></pre>
  </li>
</ol>

<h2 id="best-practice-3---add-lazy-loaded-features-to-top-level-routes-file">Best Practice #3 - Add Lazy Loaded Features to top-level Routes file</h2>

<blockquote>
  <p>Lazy loading is the concept of deferring load of code assets (javascript, styles) until the user actually needs to utilize the resources. This can bring large performance increases to perceived load times of your application as the entire code set doesn’t have to download on first paint.</p>
</blockquote>

<blockquote>
  <p>Angular provides a nice way to handle this with the <code>loadChildren</code> option for a given route. More information can be found in the <a href="https://angular.io/guide/router#lazy-loading-route-configuration">official Angular docs</a>.</p>
</blockquote>

<p>Once you’ve created your <code>app.routes.ts</code> and <code>*.routes.ts</code> files, you need to register any feature modules that you want to load lazily.</p>

<h3 id="per-feature-module">Per Feature Module…</h3>

<p>Update the <code>AppRoutes</code> array in the <code>app.routes.ts</code> file to include a new route the feature:</p>

<pre><code class="language-typescript">import { Routes } from '@angular/router';

export const AppRoutes: Routes = [
  {
    path: 'feature',
    loadChildren: './feature/feature.module#FeatureModule'
  }
];
</code></pre>

<p>By adding the above route to the array, when the user requests <code>/feature</code> in the browser, Angular lazy loads the module using the path given and then automatically registers any routes defined in the <code>feature.routes.ts</code> <code>FeatureRoutes</code> array using the <code>RouterModule.forChild</code> import.</p>

<p>For each additional feature module, you would add another item to the <code>AppRoutes</code> array. If you have multiple features, it might look something like the following:</p>

<pre><code class="language-typescript">import { Routes } from '@angular/router';

export const AppRoutes: Routes = [
  {
    path: '',
    pathMatch: 'full',
    redirectTo: 'feature-one'
  },
  {
    path: 'feature-one',
    loadChildren: './feature-one/feature-one.module#FeatureOneModule'
  },
  {
    path: 'feature-two',
    loadChildren: './feature-two/feature-two.module#FeatureTwoModule'
  }
];
</code></pre>

<h2 id="best-practice-4---keep-router-guards-organized">Best Practice #4 - Keep Router Guards Organized</h2>

<p>Here are a few tips to keep your router guards organized. These are just guidelines, but I have found them to be very helpful.</p>

<h3 id="name-your-guards-well">Name Your Guards Well</h3>

<p>Guards should use the following naming convention:</p>

<ul>
  <li>File Name: <code>name.function.guard.ts</code></li>
  <li>Class Name: <code>NameFunctionGuard</code></li>
</ul>

<p>Each part being identified as:</p>

<ul>
  <li><code>name</code> - this is the name of your guard. What are you guarding against?</li>
  <li><code>function</code> - this is the function your guard will be attached to. Angular supports <code>CanActivate</code>, <code>CanActivateChild</code>, <code>CanDeactivate</code>, and <code>Resolve</code>.</li>
</ul>

<p>An example of an Auth Guard that is attached to the <code>CanActivate</code> function would be named as follows:</p>

<ul>
  <li>File Name: <code>auth.can-activate.guard</code></li>
  <li>Class Name: <code>AuthCanActivateGuard</code></li>
</ul>

<h3 id="group-under-_guards-folder">Group under <code>_guards</code> folder</h3>

<p>Organize all top-level guards under a folder named <code>src/app/_guards</code>. I have seen apps dump guards in the top level directory and this is messy, especially if you end up with more than a few guards.</p>

<h3 id="use-barrel-exports">Use Barrel Exports</h3>
<blockquote>
  <p>The jury is still out on whether or not using barrel exports is officially considered a “best practice” or even supported by the Angular style guide. However, I am a big fan of the clean organization this provides. This method is offered as a suggestion.</p>
</blockquote>

<p>Make sure that <code>src/app/_guards</code> has a nice and clean <code>index.ts</code> barrel export. Barrel exports are simply <code>index.ts</code> files that group together and export all public files from a directory. An example is as follows:</p>

<pre><code class="language-typescript">export * from './auth.can-activate.guard';
export * from './require-save.can-deactivate.guard';
</code></pre>

<p>Without Barrel Exporting:</p>
<pre><code class="language-typescript">import { AuthCanActivateGuard } from 'src/app/_guards/auth.can-activate.guard';
import { RequireSaveCanDeactivateGuard } from 'src/app/_guards/require-save.can-deactivate.guard';
</code></pre>

<p>With Barrel Exporting:</p>
<pre><code class="language-typescript">import { AuthCanActivateGuard, RequireSaveCanDeactivateGuard } from 'src/app/_guards';
</code></pre>

<p>An example application with a <code>_guards</code> directory would look as follows:</p>

<p><img src="/assets/post_headers/routing_directory.png" alt="" /></p>

<h3 id="organize-feature-specific-route-guards">Organize Feature-Specific Route Guards</h3>

<p>If you have guards that are <em>only</em> used in a particular <code>FeatureRoutes</code> array, then store these routes underneath a folder named <code>_guards</code> underneath your feature folder. Make sure to follow the same naming conventions defined above, as well as barrel exporting.</p>

<ul>
  <li>Place guards under a folder named <code>_guards</code> underneath your feature folder</li>
  <li>Make sure to create a barrel export <code>index.ts</code> for clean importing</li>
</ul>

<p>An example feature directory with <code>_guards</code> would look as follows:</p>

<p><img src="/assets/post_headers/routing_feature_directory.png" alt="" /></p>

<h2 id="finished-application-structure">Finished Application Structure</h2>

<p>A completed application structure should look something like the following:</p>

<p><img src="/assets/post_headers/routing_completed_structure.png" alt="" /></p>

<hr />

<h2 id="example-github-repository">Example GitHub Repository</h2>

<p>I have created a demonstration repository on GitHub. Feel free to fork, clone, and submit PRs.</p>

<p><a href="https://github.com/wesleygrimes/angular-routing-best-practices">https://github.com/wesleygrimes/angular-routing-best-practices</a></p>

<h2 id="conclusion">Conclusion</h2>

<p>It’s important to remember that I have implemented these best practices in several “real world” applications. While I have found these best practices helpful, and maintainable, I do not believe they are an end-all be-all solution to organizing routes in projects; it’s just what has worked for me. I am curious as to what you all think? Please feel free to offer any suggestions, tips, or best practices you’ve learned when building enterprise Angular applications with routing and I will update the article to reflect as such. Happy Coding!</p>]]></content><author><name>Wesley Grimes</name></author><category term="angular" /><category term="angular" /><category term="javascript" /><category term="enterprise" /><category term="typescript" /><category term="routing" /><summary type="html"><![CDATA[The following represents a pattern that I've developed at my day job after building several enterpirse Angular applications. While most online tutorials do a great job laying out the fundamentals, I had a hard time locating articles that showed recommended conventions and patterns for large and scalable applications. With this pattern you should have a clean and concise organization for all routing related concerns in your applications.]]></summary></entry><entry><title type="html">Angular courses for you and your team, a review of Ultimate Courses</title><link href="https://wesleygrimes.com/angular/2019/02/22/angular-courses-for-you-and-your-team-a-review-of-ultimate-courses.html" rel="alternate" type="text/html" title="Angular courses for you and your team, a review of Ultimate Courses" /><published>2019-02-22T10:34:51+00:00</published><updated>2019-02-22T10:34:51+00:00</updated><id>https://wesleygrimes.com/angular/2019/02/22/angular-courses-for-you-and-your-team-a-review-of-ultimate-courses</id><content type="html" xml:base="https://wesleygrimes.com/angular/2019/02/22/angular-courses-for-you-and-your-team-a-review-of-ultimate-courses.html"><![CDATA[<p><img src="/assets/post_headers/ultimate_courses.jpg" alt="" /></p>

<p>As a senior developer in a small-to-medium sized software firm, I am often tasked with training new developers, or seasoned developers in new technologies. I am always on the lookout for ways to ease the burden and standardize the process for all parties involved.</p>

<p>One-on-one training and instructor-led training sessions are great, but not everyone has the resources to do this, and often times our current workloads and “deliverables” prevent us from setting aside a week (or more) to devote to training on new topics. Most of you reading this are well aware of the mainstream online training offerings that exist. <a href="https://pluralsight.com/">Pluralsight</a> and <a href="http://lynda.com/">Lynda</a> come to mind.</p>

<p>While these are fantastic resources, it’s often hard to find Angular training courses that teach on the latest and greatest versions of front-end libraries and frameworks. In this article, I will explore, <a href="https://bit.ly/2WubqhW">Ultimate Courses</a>, the offerings created and curated by <a href="https://toddmotto.com/">Todd Motto</a> (Google Developer Expert and Angular extraordinaire).</p>

<hr />

<h2 id="lets-review-the-packages">Let’s Review The Packages</h2>

<p>For Angular development, <a href="https://bit.ly/2WubqhW">Ultimate Courses</a> offers two packages to choose from: <a href="https://bit.ly/2WubqhW">Angular Kickstart Package</a> and <a href="https://bit.ly/2WubqhW">Angular Ultimate Package</a>. Let’s quickly review the differences.</p>

<h3 id="angular-kickstart-package"><a href="https://bit.ly/2WubqhW">Angular Kickstart Package</a></h3>

<p>If your team has previous TypeScript experience, then this is the package I would recommend. It includes:</p>

<ul>
  <li><em>Angular Fundamentals</em></li>
  <li><em>Angular Pro</em></li>
</ul>

<h3 id="angular-ultimate-package"><a href="https://bit.ly/2WubqhW">Angular Ultimate Package</a></h3>

<p>Learning Angular, for most developers, is not just as simple as learning the frameworks features, conventions and tooling. For most, it requires getting up to speed on <a href="http://www.typescriptlang.org/">TypeScript</a>, a powerful, typed superset of JavaScript. Teaching developers TypeScript is a must for any online solution that I recommend, and thankfully Ultimate Courses’ <a href="https://bit.ly/2WubqhW">Angular Ultimate Package</a> has you covered here. It includes:</p>

<ul>
  <li><em>Angular Fundamentals</em></li>
  <li><em>Angular Pro</em></li>
  <li><em>TypeScript Basics</em></li>
  <li><em>TypeScript Masterclass</em></li>
  <li><em>NGRX Store + Effects</em></li>
</ul>

<h2 id="individual-courses-available">Individual Courses Available</h2>

<p>Courses can be purchased in packages as stated above, however, they can also be purchased individually as needed which may make sense for some scenarios.</p>

<h2 id="team-licensing-available">Team Licensing Available</h2>

<p>If you are working with a team of developers, Ultimate Courses offers user licensing  with discounts as the user count grows. This is a great option for teams of developers learning Angular.</p>

<hr />

<h2 id="angular-fundamentals">Angular Fundamentals</h2>

<p>This course starts out from the high-level and slowly dives deeper into the basic building blocks of an Angular single page application. The content is separated into the following sections:</p>

<ul>
  <li>Architecture, setup, source files</li>
  <li>ES5 to ES6 and TypeScript refresher</li>
  <li>Getting started</li>
  <li>Template fundamentals</li>
  <li>Rendering flows</li>
  <li>Component Architecture and Feature Modules</li>
  <li>Services, Http and Observables</li>
  <li>Template-driven Forms, Inputs and Validation</li>
  <li>Component Routing</li>
</ul>

<p>I won’t dive too deep into each these sections, but I will say for an introductory course, this offering does a fantastic job of giving you just enough information to be dangerous (in a good way), while not overwhelming first-time Angular developers.</p>

<hr />

<h2 id="angular-pro">Angular Pro</h2>

<p>This course takes the concepts learned in Angular Fundamentals and goes deep, way deep. The topics covered in this course are vital to learn as any Angular app that grows in complexity will almost always need to handle these situations. I appreciate Todd’s attention to detail. Topics covered include:</p>

<ul>
  <li>Advanced Components — including dynamic component creation</li>
  <li>Directives</li>
  <li>Pipes</li>
  <li>Reactive Forms — This is a good one as the best practice for Angular forms now-a-days is considered Reactive Forms.</li>
  <li>Routing — this includes a nice deep drive into lazy loading modules, a method to speed up initial load times of large applications</li>
  <li>Unit Testing — A must have for distributed teams and complex applications. Todd walks through need-to-know topics around unit testing with built-in Angular
tooling.</li>
  <li>Dependency Injection and Zones</li>
  <li>Statement Management with Rx — although I recommend <a href="http://ngrx.io/">NgRx</a></li>
</ul>

<hr />

<h2 id="typescript-basics">TypeScript Basics</h2>

<p>This course is an introduction to <a href="https://typescriptlang.org/">TypeScript</a>. Developers coming from C# will appreciate this course in particular. In addition, this course can be purchased separately from the <a href="https://bit.ly/2WubqhW">package</a> if you are building with TypeScript. Topics include:</p>

<ul>
  <li>Overview, setup and source files</li>
  <li>ES6/7 and TypeScript</li>
  <li>Primitive Types</li>
  <li>Special Types</li>
  <li>Type Aliases and Assertions</li>
  <li>Diving into Interfaces</li>
  <li>Classes, Properties and Inheritance</li>
</ul>

<hr />

<h2 id="typescript-masterclass">TypeScript Masterclass</h2>

<p>Just as with any language, there are folks that use the basics and are off to the races. There are some cases, however, where you need to dig deep and really understand what’s happening. If you are building Angular or NodeJS libraries, then this course is probably for you. Topics include:</p>

<ul>
  <li>Understanding and Typing “this”</li>
  <li>Type Queries</li>
  <li>Mapped Types</li>
  <li>Exploring Type Guards</li>
  <li>Advanced Types and Practices</li>
  <li>Generics and Overloads</li>
  <li>Exploring Enums</li>
  <li>Declaration Files</li>
  <li>tsconfig and Compiler Options</li>
</ul>

<hr />

<h2 id="ngrx-store--effects">NGRX Store + Effects</h2>

<blockquote>
  <p>Personally, I have been using NgRx for a long time. I no longer build Angular applications without it! So for me, I was very curious to learn how Todd explains this topic. Redux is a complicated pattern for first-time developers to grasp, but it really is a must for creating quality applications.</p>
</blockquote>

<p>In the Angular realm, the Redux pattern is implemented in several libraries, the most popular being NgRx and NGXS. For those of you new to Redux, redux is a pattern for managing global state in an application. It was originally developed at Facebook, and since has taken off and is widely used through most modern front-end frameworks. NgRx is, by far, the most widely used Angular redux library. As such, Ultimate Courses has chosen to focus it’s offerings on NgRx. As we focus on this course, I must say upfront, I was pleasantly surprised and impressed with Todd’s approach to teaching NgRx. The course has been so well received, in fact, that even Mike Ryan (NgRx Core Team/Google Developer Expert) recommends this course as the best way to get started!</p>

<h4 id="course-walkthrough">Course Walkthrough</h4>

<p>The course starts out by walking through what exactly state management is, how redux accomplishes that, and how JavaScript presents challenges with mutation.</p>

<p>Once you have grasped the concept of state management using the Redux pattern, the course then has you build your very own vanilla Redux store using plain TypeScript. Realizing then, that NgRx is built on top of these concepts, it’s an easy transfer into learning NgRx.</p>

<p>After having built a vanilla redux store, the course then walks through the process of setting up a store using the tools provided by NgRx. The course walks you through creating actions, reducers, selectors, effects. The course then walks through the process of structuring lists of entities using the Entity pattern.</p>

<p>Even folks with some NgRx experience will find this course helpful as it does a deep-dive into more advanced concepts like routing with the store, preloading state, and unit testing your NgRx store.</p>

<p>Below is a detailed list of the topics covered in this course:</p>

<ul>
  <li>Redux Architecture</li>
  <li>Writing our own Redux Store</li>
  <li>Architecture: ngrx/store and components</li>
  <li>Core Essentials</li>
  <li>Effects and Entities</li>
  <li>Router State Composition</li>
  <li>Extending our State Tree</li>
  <li>Entity patterns, CRUD operations</li>
  <li>Routing via Dispatch</li>
  <li>State preload and protection via Guards</li>
  <li>Observables and Change Detection</li>
  <li>Unit Testing</li>
</ul>

<hr />

<h2 id="conclusion">Conclusion</h2>

<p>After taking these courses, and comparing other available options, I can safely recommend the <a href="https://bit.ly/2WubqhW">Angular Ultimate Package</a> for teams looking to get into Angular Enterprise development. Todd’s down-to-earth approach of explaining complex concepts, makes these courses both fun and educational. As an added bonus,  Todd does the voice-overs himself so you get to learn Angular with a British accent. Win-Win-Win.</p>

<div style="text-align:center"><img src="/assets/post_headers/ultimate_courses_2.jpg" alt="10 out of 10 Recommend" /></div>

<h3 id="more-information-on-ultimate-courses">More Information on Ultimate Courses</h3>

<p>Ultimate Courses: Expert online courses in JavaScript, Angular, NGRX and TypeScript
Expert online courses in JavaScript, Angular, NGRX and TypeScript. Join 50,000 others mastering new technologies with <a href="https://bit.ly/2WubqhW">Ultimate Courses</a></p>]]></content><author><name>Wesley Grimes</name></author><category term="angular" /><category term="javascript" /><category term="enterprise" /><category term="typescript" /><category term="tslint" /><category term="training" /><summary type="html"><![CDATA[While these are fantastic resources, it's often hard to find Angular training courses that teach on the latest and greatest versions of front-end libraries and frameworks. In this article, I will explore, Ultimate Courses, the offerings created and curated by Todd Motto (Google Developer Expert and Angular extraordinaire).]]></summary></entry><entry><title type="html">Automatically Remove All Unused Imports in a TypeScript Project</title><link href="https://wesleygrimes.com/angular/2019/02/14/how-to-use-tslint-to-autoremove-all-unused-imports-in-a-typescript-project.html" rel="alternate" type="text/html" title="Automatically Remove All Unused Imports in a TypeScript Project" /><published>2019-02-14T19:34:51+00:00</published><updated>2019-02-14T19:34:51+00:00</updated><id>https://wesleygrimes.com/angular/2019/02/14/how-to-use-tslint-to-autoremove-all-unused-imports-in-a-typescript-project</id><content type="html" xml:base="https://wesleygrimes.com/angular/2019/02/14/how-to-use-tslint-to-autoremove-all-unused-imports-in-a-typescript-project.html"><![CDATA[<p><img src="/assets/post_headers/autoremove_unused_typescript_imports.jpg" alt="" /></p>

<h2 id="the-problem">The Problem</h2>

<p>Recently, I had a need arise to programatically and recursively traverse through all <code>*.ts</code> files in a given project and remove all unused TypeScript imports. At the time this article was written, there was no way to do this within Visual Studio Code without opening each individual <code>*.ts</code> file and hitting <code>CTRL + Shift + O</code> on Windows/Linux. After some research, and much appreciated help from Twitter colleagues, I found a solution that works. This should work for Angular, React, Vue.js, or any plain TypeScript project.</p>

<h2 id="the-solution">The Solution</h2>

<p>We will use the <code>tslint</code> command line tool, in conjuction with the <code>tslint-etc</code> rules, to automatically detect and remove all unused imports in the directory, recursively. If you have a large project, the process can take some time to run. It is important to double-check all files for correctness once the fix process is complete.</p>

<h4 id="install-required-tools">Install Required Tools</h4>

<p>Install the follow node packages required to for this process to work.</p>

<pre><code class="language-shell">$ npm install -g typescript tslint tslint-etc
</code></pre>

<h4 id="create-a-temporary-tslint-config-file">Create a temporary <code>tslint</code> config file</h4>

<p>Create a new file named <code>tslint-imports.json</code> in the root of your project. This creates a hyper-focused tslint process that will only check for unused declarations. It is <em>important to note</em> that this will throw <code>tslint</code> errors on unused imports, parameters and variables. We are only using this for the <code>--fix</code> process. As such, the <code>tslint-etc</code> rules only autofix unused imports.</p>

<p>This file needs the following contents:</p>

<pre><code class="language-json">{
  "extends": [
    "tslint-etc"
  ],
  "rules": {
    "no-unused-declaration": true
  }
}
</code></pre>

<h4 id="run-the-autofix-process">Run the autofix process</h4>
<p>The following command will traverse, recursively through all <code>*.ts</code> files in the project and remove the unused imports. It save the files automatically in place.</p>

<p><strong>BE CAREFUL!</strong> This process is only reversible if you are using a source control solution like <code>git</code> or <code>svn</code>, where you can revert changes.</p>

<pre><code class="language-shell">$ tslint --config tslint-imports.json --fix --project .
</code></pre>

<h4 id="double-check-your-files">Double-Check Your Files</h4>

<p>At this point, I would highly recommend you double-check your files for correctness. This tool worked on all but 2 of my 195 <code>*.ts</code> files. Two of the components were incorrectly updated. I was able to spot this by running an <code>ng build --prod</code> as it was an <code>Angular</code> application. You could run a manual <code>tslint --project .</code> if your project doesn’t use a build tool.</p>

<h4 id="resources">Resources</h4>

<ul>
  <li><a href="https://twitter.com/wesgrimes/status/1096134870726774787">Original Twitter Conversation</a></li>
  <li><a href="https://palantir.github.io/tslint/usage/cli/">TSLint</a></li>
  <li><a href="https://cartant.github.io/tslint-etc/">tslint-etc</a></li>
</ul>]]></content><author><name>Wesley Grimes</name></author><category term="angular" /><category term="javascript" /><category term="enterprise" /><category term="typescript" /><category term="tslint" /><summary type="html"><![CDATA[We will use the `tslint` command line tool, in conjuction with the `tslint-etc` rules, to automatically detect and remove all unused imports in the directory, recursively. If you have a large project, the process can take some time to run. It is important to double-check all files for correctness once the fix process is complete.]]></summary></entry><entry><title type="html">Building an AOT Friendly Dynamic Content Outlet in Angular</title><link href="https://wesleygrimes.com/angular/2019/02/05/building-an-aot-friendly-dynamic-content-outlet.html" rel="alternate" type="text/html" title="Building an AOT Friendly Dynamic Content Outlet in Angular" /><published>2019-02-05T19:40:51+00:00</published><updated>2019-02-05T19:40:51+00:00</updated><id>https://wesleygrimes.com/angular/2019/02/05/building-an-aot-friendly-dynamic-content-outlet</id><content type="html" xml:base="https://wesleygrimes.com/angular/2019/02/05/building-an-aot-friendly-dynamic-content-outlet.html"><![CDATA[<p><img src="/assets/post_headers/dynamic_content_outlet_header.png" alt="" /></p>

<h2 id="overviewdynamic-contentoutlet">Overview — Dynamic Content Outlet</h2>

<p>Have you ever needed to dynamically load content or components in your Angular applications? How about in a way that the built-in structural directives  (<code>*ngIf*</code>, <code>*ngSwitch</code>) just don’t provide? Are you also in need of the optimization benefits of using Ahead-of-Time compilation?</p>

<p>Well, I have good news for you…(And no you don’t have to be Chuck Norris!) If you stay tuned, I will help you get a solution up and running that will provide a solid way to choose from and load dynamically, at run-time, a set of predefined modules &amp; components in your application.</p>

<blockquote>
  <p>This article is assumes you are building an Angular 6+ application generated using the Angular CLI. For information on using the Angular CLI check out the <a href="https://angular.io/cli##cli-command-reference">official documentation</a>.</p>
</blockquote>

<blockquote>
  <p>This arose out of a business need for the company that I work for. What’s important to note here is that many articles and examples exist on loading content dynamically in Angular, but none that I found worked reliably when compiling Angular with the <code>— prod</code> or <code>— aot</code> flags enabled. The good news is that what I describe in this article works fantastically with Ahead-of-Time compiling.</p>
</blockquote>

<h2 id="what-were-going-todo">What We’re Going To Do</h2>

<p>We’re going to build a special module with a dynamic component outlet that can be included and used anywhere in your application. The only requirement is that you register, upfront, an array mapping your dynamic components to their parent modules. You will also add these modules to the <code>lazyModules</code> property in your <code>angular.json</code> file. By doing so, the compiler will pre-compile these modules. The compiler then splits them off into separate minified chunks and makes them available to the SystemJS loader at runtime, with AOT.</p>

<hr />

<h2 id="lets-build-our-dynamic-contentoutlet">Let’s Build Our Dynamic Content Outlet</h2>

<p>Assuming that you have an existing Angular 6+ CLI generated project let’s run through the following steps to scaffold the necessary parts that make up this new Dynamic Content Outlet.</p>

<h3 id="generate-the-dynamic-content-outlet-module">Generate the Dynamic Content Outlet Module</h3>

<p>Generate a new module named <code>DynamicContentOutletModule</code> by running the following command in your shell of choice:</p>

<pre><code class="language-shell">$ ng g m dynamic-content-outlet
</code></pre>

<p>We will come back later to this module and wire things up.</p>

<h3 id="build-the-dynamic-content-outlet-registry">Build the Dynamic Content Outlet Registry</h3>

<p>Create a new file underneath the newly created folder <code>src/app/dynamic-content-outlet</code> named <code>dynamic-content-outlet.registry.ts</code>. This will serve as the placeholder for array mapping component name to module path and module name. For now, it will be an empty array as follows.</p>

<pre><code class="language-typescript">interface RegistryItem {
  componentName: string;
  modulePath: string;
  moduleName: string;
}

/**
 * A registry array of Component Name to details
 * that must be updated with each new component
 * that you wish to load dynamically.
 */

export const DynamicContentOutletRegistry: RegistryItem[] = [];
</code></pre>

<h3 id="build-the-dynamic-content-outlet-error-component">Build the Dynamic Content Outlet Error Component</h3>

<p>Create a new file underneath the folder <code>src/app/dynamic-content-outlet/dynamic-content-outlet-error.component.ts</code>. This will serve as the component to be rendered anytime an error occurs attempting to load a dynamic component. You can customize the <code>template</code> property to use any custom styles or layout that you may have. The <code>errorMessage</code> input must stay the same and will be fed with the actual details of the error that occurred while attempting to dynamically render your component.</p>

<pre><code class="language-typescript">import { Component, Input } from '@angular/core';

@Component({
  selector: 'app-dynamic-content-outlet-error-component',
  template: `
    &lt;div&gt;&lt;/div&gt;
  `
})
export class DynamicContentOutletErrorComponent {
  @Input() errorMessage: string;
  constructor() {}
}
</code></pre>

<h3 id="build-the-dynamic-content-outlet-service">Build the Dynamic Content Outlet Service</h3>

<p>Create a new file underneath the folder <code>src/app/dynamic-content-outlet/dynamic-content-outlet.service.ts</code>.</p>

<ul>
  <li>This service encapsulates the logic that loads dynamic components using SystemJS and renders them into the Dynamic Content Outlet.</li>
  <li>It uses the <code>DynamicContentOutletRegistry</code> to lookup the module by <code>componentName</code>.</li>
  <li>It also makes use of a new <code>static</code> property that we will add later on to each module we wish to dynamically load named <code>dynamicComponentsMap</code>. This allows us to get the type literal for the given <code>componentName</code> so that the <code>resolveComponentFactory</code> can instantiate the correct component. You might ask why we didn’t just add a fourth property to the <code>DynamicContentOutletRegistry</code>, well this is because if we import the type in the registry, then it defeats the purpose of lazy loading these modules as the the type will be included in the main bundle.</li>
  <li>If an error occurs, a <code>DynamicContentOutletErrorComponent</code> is rendered instead with the error message included.</li>
</ul>

<pre><code class="language-typescript">import {
  ComponentFactoryResolver,
  ComponentRef,
  Injectable,
  Injector,
  NgModuleFactoryLoader,
  Type
} from '@angular/core';
import { DynamicContentOutletErrorComponent } from './dynamic-content-outlet-error.component';
import { DynamicContentOutletRegistry } from './dynamic-content-outlet.registry';

type ModuleWithDynamicComponents = Type&lt;any&gt; &amp; {
  dynamicComponentsMap: {};
};

@Injectable()
export class DynamicContentOutletService {
  constructor(
    private componentFactoryResolver: ComponentFactoryResolver,
    private moduleLoader: NgModuleFactoryLoader,
    private injector: Injector
  ) {}

  async GetComponent(componentName: string): Promise&lt;ComponentRef&lt;any&gt;&gt; {
    const modulePath = this.getModulePathForComponent(componentName);

    if (!modulePath) {
      return this.getDynamicContentErrorComponent(
        `Unable to derive modulePath from component: ${componentName} in dynamic-content.registry.ts`
      );
    }

    try {
      const moduleFactory = await this.moduleLoader.load(modulePath);
      const moduleReference = moduleFactory.create(this.injector);
      const componentResolver = moduleReference.componentFactoryResolver;

      const componentType = (moduleFactory.moduleType as ModuleWithDynamicComponents)
        .dynamicComponentsMap[componentName];

      const componentFactory = componentResolver.resolveComponentFactory(
        componentType
      );
      return componentFactory.create(this.injector);
    } catch (error) {
      console.error(error.message);
      return this.getDynamicContentErrorComponent(
        `Unable to load module ${modulePath}.
                Looked up using component: ${componentName}. Error Details: ${
          error.message
        }`
      );
    }
  }

  private getModulePathForComponent(componentName: string) {
    const registryItem = DynamicContentOutletRegistry.find(
      i =&gt; i.componentName === componentName
    );

    if (registryItem &amp;&amp; registryItem.modulePath) {
      // imported modules must be in the format 'path#moduleName'
      return `${registryItem.modulePath}#${registryItem.moduleName}`;
    }

    return null;
  }

  private getDynamicContentErrorComponent(errorMessage: string) {
    const factory = this.componentFactoryResolver.resolveComponentFactory(
      DynamicContentOutletErrorComponent
    );
    const componentRef = factory.create(this.injector);
    const instance = &lt;any&gt;componentRef.instance;
    instance.errorMessage = errorMessage;
    return componentRef;
  }
}
</code></pre>

<h3 id="build-the-dynamic-content-outlet-component">Build the Dynamic Content Outlet Component</h3>

<p>Create a new file underneath the folder <code>src/app/dynamic-content-outlet/dynamic-content-outlet.component.ts</code>. This component takes an input property named <code>componentName</code> that will call the <code>DynamicContentOutletService.GetComponent</code> method passing into it <code>componentName</code>. The service then returns an instance of that rendered and compiled component for injection into the view. The service returns an error component instance if the rendering fails for some reason. The component listens for changes via the <code>ngOnChanges</code> life-cycle method. If the <code>@Input() componentName: string;</code> is set or changes it automatically re-renders the component as necessary. It also properly handles destroying the component with the <code>ngOnDestroy</code> life-cycle method.</p>

<pre><code class="language-typescript">import {
  Component,
  ComponentRef,
  Input,
  OnChanges,
  OnDestroy,
  ViewChild,
  ViewContainerRef
} from '@angular/core';
import { DynamicContentOutletService } from './dynamic-content-outlet.service';

@Component({
  selector: 'app-dynamic-content-outlet',
  template: `
    &lt;ng-container ##container&gt;&lt;/ng-container&gt;
  `
})
export class DynamicContentOutletComponent implements OnDestroy, OnChanges {
  @ViewChild('container', { read: ViewContainerRef })
  container: ViewContainerRef;

  @Input() componentName: string;

  private component: ComponentRef&lt;{}&gt;;

  constructor(private dynamicContentService: DynamicContentOutletService) {}

  async ngOnChanges() {
    await this.renderComponent();
  }

  ngOnDestroy() {
    this.destroyComponent();
  }

  private async renderComponent() {
    this.destroyComponent();

    this.component = await this.dynamicContentService.GetComponent(
      this.componentName
    );
    this.container.insert(this.component.hostView);
  }

  private destroyComponent() {
    if (this.component) {
      this.component.destroy();
      this.component = null;
    }
  }
}
</code></pre>

<h3 id="finish-wiring-up-parts-to-the-dynamic-content-outlet-module">Finish Wiring Up Parts To The Dynamic Content Outlet Module</h3>

<p>Make sure your <code>src/app/dynamic-content-outlet/dynamic-content-outlet.module.ts</code> file looks like the following:</p>

<pre><code class="language-typescript">import { CommonModule } from '@angular/common';
import {
  NgModule,
  NgModuleFactoryLoader,
  SystemJsNgModuleLoader
} from '@angular/core';
import { DynamicContentOutletErrorComponent } from './dynamic-content-outlet-error.component';
import { DynamicContentOutletComponent } from './dynamic-content-outlet.component';
import { DynamicContentOutletService } from './dynamic-content-outlet.service';

@NgModule({
  imports: [CommonModule],
  declarations: [
    DynamicContentOutletComponent,
    DynamicContentOutletErrorComponent
  ],
  exports: [DynamicContentOutletComponent],
  providers: [
    {
      provide: NgModuleFactoryLoader,
      useClass: SystemJsNgModuleLoader
    },
    DynamicContentOutletService
  ]
})
export class DynamicContentOutletModule {}
</code></pre>

<hr />

<h2 id="lets-use-our-new-dynamic-contentoutlet">Let’s Use Our New Dynamic Content Outlet</h2>

<p>Phew! Take a deep breath and grab a cup of coffee (french press fair trade organic dark roast). The hard work is behind you. Next we will go through the process of actually putting this new module into play!</p>

<p><img src="https://cdn-images-1.medium.com/max/1600/1*8BhahXd-DWmGj_n-mhP-gA.jpeg" alt="" /></p>

<p>For any component that you would like dynamically rendered you need to do the following four steps. <strong><em>These steps must be followed exactly</em></strong><em>.</em></p>

<h3 id="1-prepare-your-module-for-dynamic-import">1. Prepare your module for dynamic import</h3>

<ul>
  <li>
    <p>Confirm that the component is listed in the <code>entryComponents</code> array in the module that the component is a part of.</p>
  </li>
  <li>
    <p>Add to the module, a new <code>static</code> property called <code>dynamicComponentsMap</code>. This allows us to get the type literal for the given <code>componentName</code> so that the <code>resolveComponentFactory</code> can instantiate the correct component.</p>
  </li>
</ul>

<blockquote>
  <p>You might ask why we didn’t just add a fourth property to the <code>DynamicContentOutletRegistry</code> named <code>componentType</code>; well this is because if we import the type in the registry, then it defeats the purpose of lazy loading these modules as the the type will be included in the main bundle.</p>
</blockquote>

<p>A prepared module might look as follows:</p>

<pre><code class="language-typescript">import { CommonModule } from '@angular/common';
import { NgModule } from '@angular/core';
import { DynamicMultipleOneComponent } from './dynamic-multiple-one.component';
import { DynamicMultipleTwoComponent } from './dynamic-multiple-two.component';

@NgModule({
  declarations: [MySpecialDynamicContentComponent],
  imports: [CommonModule],
  entryComponents: [MySpecialDynamicContentComponent]
})
export class MySpecialDynamicContentModule {
  static dynamicComponentsMap = {
    MySpecialDynamicContentComponent
  };
}
</code></pre>

<h3 id="2-add-your-dynamic-components-to-the-registry">2. Add your dynamic component(s) to the registry</h3>

<p>For any component that you would like dynamically rendered, add a new entry to the <code>DynamicContentOutletRegistry</code> array in <code>src/app/dynamic-content-outlet/dynamic-content-outlet.registry.ts</code>.</p>

<p>The following properties must be filled out:</p>

<ul>
  <li>
    <p><code>componentName</code>: This should match exactly the name of the Component you wish to load dynamically.</p>
  </li>
  <li>
    <p><code>modulePath</code>: The absolute path to the module containing the component you wish to load dynamically. This is only the path to the module and does NOT include <code>moduleName</code> after a <code>#</code>.</p>
  </li>
  <li>
    <p><code>moduleName</code>: This is the exact name of the module.</p>
  </li>
</ul>

<h4 id="example-component-mapping">Example Component Mapping</h4>

<pre><code class="language-typescript">{
  componentName: 'MySpecialDynamicContentComponent',
  modulePath: 'src/app/my-special-dynamic-content/my-special-dynamic-content.module',
  moduleName: 'MySpecialDynamicContentModule'
},
</code></pre>

<h3 id="3-add-your-dynamic-modules-to-the-lazymodules-array">3. Add your dynamic modules to the lazyModules array</h3>

<p>In your <code>angular.json</code> update the <code>projects &gt; ** &gt; architect &gt; build &gt; options &gt; lazyModules</code> array and add an item for each module that you added to the registry in order for the Angular AOT compiler to detect and pre-compile your dynamic modules. If you have multiple projects in a folder, make sure you add this for the correct project you are importing and using dynamic modules in. The updated file will look similar to this:</p>

<pre><code class="language-json">{
  ...
  "projects": {
    "angular-dynamic-content": {
      ...
      "architect": {
        "build": {
          "builder": "@angular-devkit/build-angular:browser",
          "options": {
            ...
            "lazyModules": ["src/app/my-special-dynamic-content/my-special-dynamic-content.module"]
          },
        }
      }
    }
  }
}
</code></pre>

<h3 id="wire-up-the-dynamic-content-outletmodule">Wire up the Dynamic Content Outlet Module</h3>

<p>Up to this point you have created your dynamic content outlet module and registered your components to be available in the outlet. The last thing we need to do is wire up our new <code>DynamicContentOutletModule</code> to be used in our application. In order to do so you need to:</p>

<ol>
  <li>Add your new <code>DynamicContentOutletModule</code> to the <code>imports</code> array of any feature module or the main <code>AppModule</code> of your Angular application.</li>
</ol>

<h4 id="example-of-addition-to-the-imports-array">Example of addition to the <code>imports</code> array</h4>

<pre><code class="language-typescript">@NgModule({
...
imports: [
   ...
   DynamicContentOutletModule
  ],
  ...
})
export class AppModule {}
</code></pre>

<ol>
  <li>Add the following tag to the template of the parent component that you would like to render the dynamic content in:</li>
</ol>

<pre><code class="language-html">&lt;app-dynamic-content-outlet [componentName]="'MyComponent'"&gt;
&lt;/app-dynamic-content-outlet&gt;
</code></pre>

<p>This is very similar in nature to Angular’s built-in <code>&lt;router-outlet&gt;/&lt;/router-outlet&gt;</code> tag.</p>

<ol>
  <li>Happy <code>ng serve --prod</code> ing!</li>
</ol>

<h2 id="real-world-complex-example">Real-World Complex Example</h2>

<p>If you are interested in a more in-depth real-world example, then check out the Github Repository which will demonstrate the following:</p>

<ul>
  <li>Dynamic modules with multiple components</li>
  <li>Demonstrating the use of on-the-fly component changes</li>
  <li>Demonstrating that the scoped styles are loaded dynamically for each component</li>
</ul>

<blockquote>
  <p>GitHub Repository Example <a href="https://github.com/wesleygrimes/angular-dynamic-content">https://github.com/wesleygrimes/angular-dynamic-content</a></p>
</blockquote>

<h2 id="conclusion">Conclusion</h2>

<p>Hopefully you have found this solution helpful. Here is the full GitHub repository example for you to clone and play around with. PR’s are welcome, appreciated, encouraged and accepted!</p>

<h2 id="additional-resources">Additional Resources</h2>

<p>I would highly recommend enrolling in the Ultimate Angular courses. It is well worth the money and I have used it as a training tool for new Angular developers. Follow the link below to signup.</p>

<p><a href="https://ultimatecourses.com/?ref=76683_ttll_neb">Ultimate Courses: Expert online courses in JavaScript, Angular, NGRX and TypeScript</a></p>

<h2 id="special-thanks">Special Thanks</h2>

<p>I want to take a moment and thank all those I was able to glean this information from. I did not come up with all this on my own, but I was able to get a working solution by combining parts from each of these articles!</p>

<ul>
  <li>
    <p><a href="https://blog.angularindepth.com/dynamically-loading-components-with-angular-cli-92a3c69bcd28">Dynamically Loading Components with Angular CLI</a></p>
  </li>
  <li>
    <p><a href="https://blog.angularindepth.com/here-is-what-you-need-to-know-about-dynamic-components-in-angular-ac1e96167f9e">Here is what you need to know about dynamic components in Angular</a></p>
  </li>
  <li>
    <p><a href="https://netbasal.com/the-need-for-speed-lazy-load-non-routable-modules-in-angular-30c8f1c33093">The Need for Speed Lazy Load Non-Routable Modules in Angular</a></p>
  </li>
  <li>
    <p>Also, a huge thank you to Medium reader <a href="https://twitter.com/ivanwond">ivanwonder</a> and Github user <a href="https://github.com/milansar">Milan Saraiya</a> for pointing this out and providing a fork example of resolution.</p>
  </li>
</ul>]]></content><author><name>Wesley Grimes</name></author><category term="angular" /><category term="angular" /><category term="javascript" /><category term="enterprise" /><category term="dynamic" /><summary type="html"><![CDATA[Have you ever needed to dynamically load content or components in your Angular applications? How about in a way that the built-in structural directives , ngIf and ngSwitch  just don’t provide? Are you also in need of the optimization benefits of using Ahead-of-Time compilation?]]></summary></entry><entry><title type="html">NgRx — Best Practices for Enterprise Angular Applications</title><link href="https://wesleygrimes.com/angular/2018/05/30/ngrx-best-practices-for-enterprise-angular-applications.html" rel="alternate" type="text/html" title="NgRx — Best Practices for Enterprise Angular Applications" /><published>2018-05-30T15:00:00+00:00</published><updated>2018-05-30T15:00:00+00:00</updated><id>https://wesleygrimes.com/angular/2018/05/30/ngrx-best-practices-for-enterprise-angular-applications</id><content type="html" xml:base="https://wesleygrimes.com/angular/2018/05/30/ngrx-best-practices-for-enterprise-angular-applications.html"><![CDATA[<p><img src="/assets/post_headers/ngrx_best_practices_header.png" alt="" /></p>

<h2 id="before-we-getstarted">Before We Get Started</h2>

<p>This article is not intended to be a tutorial on <strong>NgRx</strong>. There are several great resources that currently exist, written by experts much smarter than me. I highly suggest that you take time and learn <strong>NgRx</strong> and the <strong>redux</strong> pattern before attempting to implement these concepts.</p>

<ul>
  <li><a href="https://platform.ultimatecourses.com/p/ngrx-store-effects?affcode=76683_ttll_neb">Ultimate Angular — NgRx Store &amp; Effects</a></li>
  <li><a href="https://www.pluralsight.com/courses/play-by-play-angular-ngrx">Pluralsight — Play by Play Angular NgRx</a></li>
  <li><a href="https://medium.com/ngrx">NgRx Blog on Medium.com</a></li>
  <li><a href="https://ngrx.io/docs">NgRx.io Docs</a></li>
  <li><a href="https://ngrx.io/resources">NgRx.io Resources</a></li>
</ul>

<h2 id="background">Background</h2>

<p>The following represents a pattern that I’ve developed at my day job after building several enterprise Angular applications using the <strong>NgRx</strong> library. I have found that most online tutorials do a great job of helping you to get your store up and running, but often fall short of illustrating best practices for clean separation of concerns between your store feature slices, root store, and user interface.</p>

<p>With the following pattern, your root application state, and each slice (property) of that root application state are separated into a <code>RootStoreModule</code> and per feature <code>MyFeatureStoreModule</code>.</p>

<h2 id="prerequisites">Prerequisites</h2>

<p>This article assumes that you are building an <a href="https://cli.angular.io/">Angular v7 CLI</a> generated application.</p>

<h2 id="installing-ngrx-dependencies">Installing NgRx Dependencies</h2>

<p>Before we get started with generating code, let’s make sure to install the necessary <strong>NgRx</strong> node modules from a prompt:</p>

<pre><code class="language-shell">$ npm install @ngrx/{store,store-devtools,entity,effects}
</code></pre>

<h2 id="best-practice-1the-root-storemodule">Best Practice #1 — The Root Store Module</h2>

<p>Create a Root Store Module as a proper Angular <strong>NgModule’s</strong> that bundle together NgRx store logic. Feature store modules will be imported into the Root Store Module allowing for a single root store module to be imported into your application’s main App Module.</p>

<h3 id="suggested-implementation">Suggested Implementation</h3>

<ol>
  <li>Generate <code>RootStoreModule</code> using the <strong>Angular CLI:</strong></li>
</ol>

<pre><code class="language-shell">$ ng g module root-store --flat false --module app.module.ts
</code></pre>

<ol>
  <li>Generate <code>RootState</code> interface to represent the entire state of your application using the <strong>Angular CLI:</strong></li>
</ol>

<pre><code class="language-shell">$ ng g interface root-store/root-state
</code></pre>

<p>This will create an interface named <code>RootState</code> but you will need to rename it to <code>State</code> inside the generated <code>.ts</code> file as we want to later on utilize this as <code>RootStoreState.State</code></p>

<p>PLEASE NOTE: You will come back later on and add to this interface each feature module as a property.</p>

<h2 id="best-practice-2create-feature-store-modules">Best Practice #2 — Create Feature Store Module(s)</h2>

<p>Create feature store modules as proper Angular NgModule’s that bundle together feature slices of your store, including <code>state</code>, <code>actions</code>, <code>reducer</code>, <code>selectors</code>, and <code>effects</code>. Feature modules are then imported into your <code>RootStoreModule</code>. This will keep your code cleanly organizing into sub-directories for each feature store. In addition, as illustrated later on in the article, public <code>actions</code>, <code>selectors</code>, and <code>state</code> are name-spaced and exported with feature store prefixes.</p>

<h3 id="naming-your-featurestore">Naming Your Feature Store</h3>

<p>In the example implementation below we will use the feature name <code>MyFeature</code>, however, this will be different for each feature you generate and should closely mirror the <code>RootState</code> property name. For example, if you are building a blog application, a feature name might be <code>Post</code>.</p>

<h3 id="entity-feature-modules-or-standard-featuremodules">Entity Feature Modules or Standard Feature Modules?</h3>

<p>Depending on the type of feature you are creating you may or may not benefit from implementing <a href="https://medium.com/ngrx/introducing-ngrx-entity-598176456e15">NgRx Entity</a>. If your store feature slice will be dealing with an array of type then I suggest following the <em>Entity Feature Module</em> implementation below. If building a store feature slice that does not consist of a standard array of type, then I suggest following the <em>Standard Feature Module</em> implementation below.</p>

<h3 id="suggested-implementationentity-featuremodule">Suggested Implementation — Entity Feature Module</h3>

<ol>
  <li>Generate <code>MyFeatureStoreModule</code> feature module using the <strong>Angular CLI:</strong></li>
</ol>

<pre><code class="language-shell">$ ng g module root-store/my-feature-store --flat false --module root-store/root-store.module.ts
</code></pre>

<ol>
  <li>Actions — Create an <code>actions.ts</code> file in the <code>app/root-store/my-feature-store</code> directory:</li>
</ol>

<pre><code class="language-typescript">import { Action } from @ngrx/store;
import { MyModel } from '../../models';

export enum ActionTypes {
  LOAD_REQUEST = '[My Feature] Load Request',
  LOAD_FAILURE = '[My Feature] Load Failure',
  LOAD_SUCCESS = '[My Feature] Load Success'
}

export class LoadRequestAction implements Action {
  readonly type = ActionTypes.LOAD_REQUEST;
}

export class LoadFailureAction implements Action {
  readonly type = ActionTypes.LOAD_FAILURE;
  constructor(public payload: { error: string }) {}
}

export class LoadSuccessAction implements Action {
  readonly type = ActionTypes.LOAD_SUCCESS;
  constructor(public payload: { items: MyModel[] }) {}
}

export type Actions = LoadRequestAction | LoadFailureAction | LoadSuccessAction;
</code></pre>

<ol>
  <li>State — Create a <code>state.ts</code> file in the <code>app/root-store/my-feature-store</code> directory:</li>
</ol>

<pre><code class="language-typescript">import { createEntityAdapter, EntityAdapter, EntityState } from '@ngrx/entity';
import { MyModel } from '../../models';

export const featureAdapter: EntityAdapter&lt;MyModel&gt; = createEntityAdapter&lt;
  MyModel
&gt;({
  selectId: model =&gt; model.id,
  sortComparer: (a: MyModel, b: MyModel): number =&gt;
    b.someDate.toString().localeCompare(a.someDate.toString())
});

export interface State extends EntityState&lt;MyModel&gt; {
  isLoading?: boolean;
  error?: any;
}

export const initialState: State = featureAdapter.getInitialState({
  isLoading: false,
  error: null
});
</code></pre>

<ol>
  <li>Reducer — Create a <code>reducer.ts</code> file in the <code>app/root-store/my-feature-store</code> directory:</li>
</ol>

<pre><code class="language-typescript">import { Actions, ActionTypes } from './actions';
import { featureAdapter, initialState, State } from './state';

export function featureReducer(state = initialState, action: Actions): State {
  switch (action.type) {
    case ActionTypes.LOAD_REQUEST: {
      return {
        ...state,
        isLoading: true,
        error: null
      };
    }
    case ActionTypes.LOAD_SUCCESS: {
      return featureAdapter.addAll(action.payload.items, {
        ...state,
        isLoading: false,
        error: null
      });
    }
    case ActionTypes.LOAD_FAILURE: {
      return {
        ...state,
        isLoading: false,
        error: action.payload.error
      };
    }
    default: {
      return state;
    }
  }
}
</code></pre>

<ol>
  <li>Selectors — Create a <code>selectors.ts</code> file in the <code>app/root-store/my-feature-store</code> directory:</li>
</ol>

<pre><code class="language-typescript">import {
  createFeatureSelector,
  createSelector,
  MemoizedSelector
} from '@ngrx/store';

import { MyModel } from '../models';

import { featureAdapter, State } from './state';

export const getError = (state: State): any =&gt; state.error;

export const getIsLoading = (state: State): boolean =&gt; state.isLoading;

export const selectMyFeatureState: MemoizedSelector&lt;
  object,
  State
&gt; = createFeatureSelector&lt;State&gt;('myFeature');

export const selectAllMyFeatureItems: (
  state: object
) =&gt; MyModel[] = featureAdapter.getSelectors(selectMyFeatureState).selectAll;

export const selectMyFeatureById = (id: string) =&gt;
  createSelector(
    this.selectAllMyFeatureItems,
    (allMyFeatures: MyModel[]) =&gt; {
      if (allMyFeatures) {
        return allMyFeatures.find(p =&gt; p.id === id);
      } else {
        return null;
      }
    }
  );

export const selectMyFeatureError: MemoizedSelector&lt;
  object,
  any
&gt; = createSelector(
  selectMyFeatureState,
  getError
);

export const selectMyFeatureIsLoading: MemoizedSelector&lt;
  object,
  boolean
&gt; = createSelector(
  selectMyFeatureState,
  getIsLoading
);
</code></pre>

<ol>
  <li>Effects — Create an <code>effects.ts</code> file in the <code>app/root-store/my-feature-store</code> directory with the following:</li>
</ol>

<pre><code class="language-typescript">import { Injectable } from '@angular/core';
import { Actions, Effect, ofType } from '@ngrx/effects';
import { Action } from '@ngrx/store';
import { Observable, of as observableOf } from 'rxjs';
import { catchError, map, startWith, switchMap } from 'rxjs/operators';
import { DataService } from '../../services/data.service';
import * as featureActions from './actions';

@Injectable()
export class MyFeatureStoreEffects {
  constructor(private dataService: DataService, private actions$: Actions) {}

  @Effect()
  loadRequestEffect$: Observable&lt;Action&gt; = this.actions$.pipe(
    ofType&lt;featureActions.LoadRequestAction&gt;(
      featureActions.ActionTypes.LOAD_REQUEST
    ),
    startWith(new featureActions.LoadRequestAction()),
    switchMap(action =&gt;
      this.dataService.getItems().pipe(
        map(
          items =&gt;
            new featureActions.LoadSuccessAction({
              items
            })
        ),
        catchError(error =&gt;
          observableOf(new featureActions.LoadFailureAction({ error }))
        )
      )
    )
  );
}
</code></pre>

<h4 id="suggested-implementationstandard-featuremodule">Suggested Implementation — Standard Feature Module</h4>

<ol>
  <li>Generate <code>MyFeatureStoreModule</code> feature module using the <strong>Angular CLI:</strong></li>
</ol>

<pre><code class="language-shell">$ ng g module root-store/my-feature-store --flat false --module root-store/root-store.module.ts
</code></pre>

<ol>
  <li>Actions — Create an <code>actions.ts</code> file in the <code>app/root-store/my-feature-store</code> directory:</li>
</ol>

<pre><code class="language-typescript">import { Action } from '@ngrx/store';
import { User } from '../../models';

export enum ActionTypes {
  LOGIN_REQUEST = '[My Feature] Login Request',
  LOGIN_FAILURE = '[My Feature] Login Failure',
  LOGIN_SUCCESS = '[My Feature] Login Success'
}

export class LoginRequestAction implements Action {
  readonly type = ActionTypes.LOGIN_REQUEST;
  constructor(public payload: { userName: string; password: string }) {}
}

export class LoginFailureAction implements Action {
  readonly type = ActionTypes.LOGIN_FAILURE;
  constructor(public payload: { error: string }) {}
}

export class LoginSuccessAction implements Action {
  readonly type = ActionTypes.LOGIN_SUCCESS;
  constructor(public payload: { user: User }) {}
}

export type Actions =
  | LoginRequestAction
  | LoginFailureAction
  | LoginSuccessAction;
</code></pre>

<ol>
  <li>State — Create a <code>state.ts</code> file in the <code>app/root-store/my-feature-store</code> directory:</li>
</ol>

<pre><code class="language-typescript">import { User } from '../../models';

export interface State {
  user: User | null;
  isLoading: boolean;
  error: string;
}

export const initialState: State = {
  user: null,
  isLoading: false,
  error: null
};
</code></pre>

<ol>
  <li>Reducer — Create a <code>reducer.ts</code> file in the <code>app/root-store/my-feature-store</code> directory:</li>
</ol>

<pre><code class="language-typescript">import { Actions, ActionTypes } from './actions';
import { initialState, State } from './state';

export function featureReducer(state = initialState, action: Actions): State {
  switch (action.type) {
    case ActionTypes.LOGIN_REQUEST:
      return {
        ...state,
        error: null,
        isLoading: true
      };
    case ActionTypes.LOGIN_SUCCESS:
      return {
        ...state,
        user: action.payload.user,
        error: null,
        isLoading: false
      };
    case ActionTypes.LOGIN_FAILURE:
      return {
        ...state,
        error: action.payload.error,
        isLoading: false
      };
    default: {
      return state;
    }
  }
}
</code></pre>

<ol>
  <li>Selectors — Create a <code>selectors.ts</code> file in the <code>app/root-store/my-feature-store</code> directory:</li>
</ol>

<pre><code class="language-typescript">import {
  createFeatureSelector,
  createSelector,
  MemoizedSelector
} from '@ngrx/store';

import { User } from '../../models';

import { State } from './state';

const getError = (state: State): any =&gt; state.error;

const getIsLoading = (state: State): boolean =&gt; state.isLoading;

const getUser = (state: State): any =&gt; state.user;

export const selectMyFeatureState: MemoizedSelector&lt;
  object,
  State
&gt; = createFeatureSelector&lt;State&gt;('myFeature');

export const selectMyFeatureError: MemoizedSelector&lt;
  object,
  any
&gt; = createSelector(
  selectMyFeatureState,
  getError
);

export const selectMyFeatureIsLoading: MemoizedSelector&lt;
  object,
  boolean
&gt; = createSelector(
  selectMyFeatureState,
  getIsLoading
);

export const selectMyFeatureUser: MemoizedSelector&lt;
  object,
  User
&gt; = createSelector(
  selectMyFeatureState,
  getUser
);
</code></pre>

<ol>
  <li>Effects — Create an <code>effects.ts</code> file in the <code>app/root-store/my-feature-store</code> directory with the following:</li>
</ol>

<pre><code class="language-typescript">import { Injectable } from '@angular/core';
import { Actions, Effect, ofType } from '@ngrx/effects';
import { Action } from '@ngrx/store';
import { Observable, of as observableOf } from 'rxjs';
import { catchError, map, startWith, switchMap } from 'rxjs/operators';
import { DataService } from '../../services/data.service';
import * as featureActions from './actions';

@Injectable()
export class MyFeatureStoreEffects {
  constructor(private dataService: DataService, private actions$: Actions) {}

  @Effect()
  loginRequestEffect$: Observable&lt;Action&gt; = this.actions$.pipe(
    ofType&lt;featureActions.LoginRequestAction&gt;(
      featureActions.ActionTypes.LOGIN_REQUEST
    ),
    switchMap(action =&gt;
      this.dataService
        .login(action.payload.userName, action.payload.password)
        .pipe(
          map(
            user =&gt;
              new featureActions.LoginSuccessAction({
                user
              })
          ),
          catchError(error =&gt;
            observableOf(new featureActions.LoginFailureAction({ error }))
          )
        )
    )
  );
}
</code></pre>

<h4 id="suggested-implementationentity-and-standard-featuremodules">Suggested Implementation — Entity and Standard Feature Modules</h4>

<p>Now that we have created our feature module, either Entity or Standard typed above, we need to import the parts (state, actions, reducer, effects, selectors) into the Angular NgModule for the feature. In addition, we will create a barrel export in order to make imports in our application components clean and orderly, with asserted name-spaces.</p>

<ol>
  <li>Update the <code>app/root-store/my-feature-store/my-feature-store.module.ts</code> with the following:</li>
</ol>

<pre><code class="language-typescript">import { CommonModule } from '@angular/common';
import { NgModule } from '@angular/core';
import { EffectsModule } from '@ngrx/effects';
import { StoreModule } from '@ngrx/store';
import { MyFeatureStoreEffects } from './effects';
import { featureReducer } from './reducer';

@NgModule({
  imports: [
    CommonModule,
    StoreModule.forFeature('myFeature', featureReducer),
    EffectsModule.forFeature([MyFeatureStoreEffects])
  ],
  providers: [MyFeatureStoreEffects]
})
export class MyFeatureStoreModule {}
</code></pre>

<ol>
  <li>Create an <code>app/root-store/my-feature-store/index.ts</code> <a href="https://twitter.com/toddmotto/status/918818392680824832">barrel export</a>. You will notice that we import our store components and alias them before re-exporting them. This in essence is “name-spacing” our store components.</li>
</ol>

<pre><code class="language-typescript">import * as MyFeatureStoreActions from './actions';
import * as MyFeatureStoreSelectors from './selectors';
import * as MyFeatureStoreState from './state';

export { MyFeatureStoreModule } from './my-feature-store.module';

export { MyFeatureStoreActions, MyFeatureStoreSelectors, MyFeatureStoreState };
</code></pre>

<h2 id="best-practice-1the-root-store-modulecont">Best Practice #1 — The Root Store Module (cont.)</h2>

<p>Now that we have built our feature modules, let’s pick up where we left off in best practice ##1 and finish building out our <code>RootStoreModule</code> and <code>RootState.</code></p>

<h3 id="suggested-implementation-cont">Suggested Implementation (cont.)</h3>

<ol>
  <li>Update <code>app/root-store/root-state.ts</code> and add a property for each feature that we have created previously:</li>
</ol>

<pre><code class="language-typescript">import { MyFeatureStoreState } from './my-feature-store';
import { MyOtherFeatureStoreState } from './my-other-feature-store';

export interface State {
  myFeature: MyFeatureStoreState.State;
  myOtherFeature: MyOtherFeatureStoreState.State;
}
</code></pre>

<ol>
  <li>Update your <code>app/root-store/root-store.module.ts</code> by importing all feature modules, and importing the following <strong>NgRx</strong> modules: <code>StoreModule.forRoot({})</code> and <code>EffectsModule.forRoot([])</code>:</li>
</ol>

<pre><code class="language-typescript">import { CommonModule } from '@angular/common';
import { NgModule } from '@angular/core';
import { EffectsModule } from '@ngrx/effects';
import { StoreModule } from '@ngrx/store';
import { MyFeatureStoreModule } from './my-feature-store/';
import { MyOtherFeatureStoreModule } from './my-other-feature-store/';

@NgModule({
  imports: [
    CommonModule,
    MyFeatureStoreModule,
    MyOtherFeatureStoreModule,
    StoreModule.forRoot({}),
    EffectsModule.forRoot([])
  ],
  declarations: []
})
export class RootStoreModule {}
</code></pre>

<ol>
  <li>Create an <code>app/root-store/selectors.ts</code> file. This will hold any root state level selectors, such as a Loading property, or even an aggregate Error property:</li>
</ol>

<pre><code class="language-typescript">import { createSelector, MemoizedSelector } from '@ngrx/store';
import { MyFeatureStoreSelectors } from './my-feature-store';

import { MyOtherFeatureStoreSelectors } from './my-other-feature-store';

export const selectError: MemoizedSelector&lt;object, string&gt; = createSelector(
  MyFeatureStoreSelectors.selectMyFeatureError,
  MyOtherFeatureStoreSelectors.selectMyOtherFeatureError,
  (myFeatureError: string, myOtherFeatureError: string) =&gt; {
    return myFeature || myOtherFeature;
  }
);

export const selectIsLoading: MemoizedSelector&lt;
  object,
  boolean
&gt; = createSelector(
  MyFeatureStoreSelectors.selectMyFeatureIsLoading,
  MyOtherFeatureStoreSelectors.selectMyOtherFeatureIsLoading,
  (myFeature: boolean, myOtherFeature: boolean) =&gt; {
    return myFeature || myOtherFeature;
  }
);
</code></pre>

<ol>
  <li>Create an <code>app/root-store/index.ts</code> barrel export for your store with the following:</li>
</ol>

<pre><code class="language-typescript">import { RootStoreModule } from './root-store.module';
import * as RootStoreSelectors from './selectors';
import * as RootStoreState from './state';
export * from './my-feature-store';
export * from './my-other-feature-store';
export { RootStoreState, RootStoreSelectors, RootStoreModule };
</code></pre>

<h2 id="wiring-up-the-root-store-module-to-your-application">Wiring up the Root Store Module to your Application</h2>

<p>Now that we have built our Root Store Module, composed of Feature Store Modules, let’s add it to the main <code>app.module.ts</code> and show just how neat and clean the wiring up process is.</p>

<ol>
  <li>Add <code>RootStoreModule</code> to your application’s <code>NgModule.imports</code> array. Make sure that when you import the module to pull from the barrel export:</li>
</ol>

<pre><code class="language-typescript">import { RootStoreModule } from './root-store';
</code></pre>

<ol>
  <li>Here’s an example <code>container</code> component that is using the store:</li>
</ol>

<pre><code class="language-typescript">import { Component, OnInit } from '@angular/core';
import { Store } from '@ngrx/store';
import { Observable } from 'rxjs';
import { MyModel } from '../../models';
import {
  RootStoreState,
  MyFeatureStoreActions,
  MyFeatureStoreSelectors
} from '../../root-store';

@Component({
  selector: 'app-my-feature',
  styleUrls: ['my-feature.component.css'],
  templateUrl: './my-feature.component.html'
})
export class MyFeatureComponent implements OnInit {
  myFeatureItems$: Observable&lt;MyModel[]&gt;;
  error$: Observable&lt;string&gt;;
  isLoading$: Observable&lt;boolean&gt;;

  constructor(private store$: Store&lt;RootStoreState.State&gt;) {}

  ngOnInit() {
    this.myFeatureItems$ = this.store$.select(
      MyFeatureStoreSelectors.selectAllMyFeatureItems
    );

    this.error$ = this.store$.select(
      MyFeatureStoreSelectors.selectUnProcessedDocumentError
    );

    this.isLoading$ = this.store$.select(
      MyFeatureStoreSelectors.selectUnProcessedDocumentIsLoading
    );

    this.store$.dispatch(new MyFeatureStoreActions.LoadRequestAction());
  }
}
</code></pre>
<hr />

<h2 id="finished-application-structure">Finished Application Structure</h2>

<p>Once we have completed implementation of the above best practices our Angular application structure should look very similar to something like this:</p>

<pre><code class="language-shell"> ├── app
 │ ├── app-routing.module.ts
 │ ├── app.component.css
 │ ├── app.component.html
 │ ├── app.component.ts
 │ ├── app.module.ts
 │ ├── components
 │ ├── containers
 │ │    └── my-feature
 │ │         ├── my-feature.component.css
 │ │         ├── my-feature.component.html
 │ │         └── my-feature.component.ts
 │ ├── models
 │ │    ├── index.ts
 │ │    └── my-model.ts
 │ │    └── user.ts
 │ ├── root-store
 │ │    ├── index.ts
 │ │    ├── root-store.module.ts
 │ │    ├── selectors.ts
 │ │    ├── state.ts
 │ │    └── my-feature-store
 │ │    |    ├── actions.ts
 │ │    |    ├── effects.ts
 │ │    |    ├── index.ts
 │ │    |    ├── reducer.ts
 │ │    |    ├── selectors.ts
 │ │    |    ├── state.ts
 │ │    |    └── my-feature-store.module.ts
 │ │    └── my-other-feature-store
 │ │         ├── actions.ts
 │ │         ├── effects.ts
 │ │         ├── index.ts
 │ │         ├── reducer.ts
 │ │         ├── selectors.ts
 │ │         ├── state.ts
 │ │         └── my-other-feature-store.module.ts
 │ └── services
 │      └── data.service.ts
 ├── assets
 ├── browserslist
 ├── environments
 │ ├── environment.prod.ts
 │ └── environment.ts
 ├── index.html
 ├── main.ts
 ├── polyfills.ts
 ├── styles.css
 ├── test.ts
 ├── tsconfig.app.json
 ├── tsconfig.spec.json
 └── tslint.json
</code></pre>

<hr />

<h2 id="fully-working-examplechuck-norris-joke-generator">Fully Working Example — Chuck Norris Joke Generator</h2>

<p>I have put together a fully working example of the above best practices. It’s a simple Chuck Norris Joke Generator that has uses <code>@angular/material</code> and the <a href="http://www.icndb.com/">http://www.icndb.com/</a> api for data.</p>

<h3 id="github">Github</h3>

<p><a href="https://github.com/wesleygrimes/angular-ngrx-chuck-norris">https://github.com/wesleygrimes/angular-ngrx-chuck-norris</a></p>

<h3 id="stackblitz">Stackblitz</h3>

<p>You can see the live demo at <a href="https://angular-ngrx-chuck-norris.stackblitz.io">https://angular-ngrx-chuck-norris.stackblitz.io</a> and here is the <a href="https://stackblitz.com">Stackblitz</a> editor:</p>

<p><a href="https://stackblitz.com/edit/angular-ngrx-chuck-norris">angular-ngrx-chuck-norris - StackBlitz</a></p>

<hr />

<h2 id="conclusion">Conclusion</h2>

<p>It’s important to remember that I have implemented these best practices in several “real world” applications. While I have found these best practices helpful, and maintainable, I do not believe they are an end-all be-all solution to organizing NgRx projects; it’s just what has worked for me. I am curious as to what you all think? Please feel free to offer any suggestions, tips, or best practices you’ve learned when building enterprise Angular applications with NgRx and I will update the article to reflect as such. Happy Coding!</p>

<hr />

<h2 id="additional-resources">Additional Resources</h2>

<p>I would highly recommend enrolling in the Ultimate Angular courses, especially the NgRx course. It is well worth the money and I have used it as a training tool for new Angular developers. Follow the link below to signup.</p>

<p><a href="https://bit.ly/2WubqhW">Ultimate Courses: Expert online courses in JavaScript, Angular, NGRX and TypeScript</a></p>]]></content><author><name>Wesley Grimes</name></author><category term="angular" /><category term="angular" /><category term="ngrx" /><category term="javascript" /><category term="redux" /><summary type="html"><![CDATA[The following represents a pattern that I’ve developed at my day job after building several enterprise Angular applications using the NgRx library. I have found that most online tutorials do a great job of helping you to get your store up and running, but often fall short of illustrating best practices for clean separation of concerns between your store feature slices, root store, and user interface.]]></summary></entry></feed>